
share: 


Customer loyalty isn’t just a metric—it’s a business imperative. Are you effectively measuring it?
An NPS survey (Net Promoter Score survey) is one of the most widely used methods to gauge customer sentiment and loyalty, helping businesses understand how likely customers are to recommend their brand. Measuring and improving NPS scores is critical to strengthening customer relationships and driving long-term growth.
By automating NPS surveys with SurveyVista, a 100% Native Salesforce Survey Solution, you can seamlessly collect and analyze customer feedback, take immediate action on detractors, and track trends over time—all while integrating NPS insights directly into Salesforce.
In this blog, we’ll walk you through how to automate your NPS survey process in SurveyVista, ensuring you capture meaningful customer insights without manual effort.
Why Automate NPS Surveys?
Imagine this: A customer enjoys using your product but encounters a minor issue. They receive an automated NPS survey, respond with a low score, and provide feedback about their concern. Within hours, your support team follows up to resolve the issue—turning a potential detractor into a loyal advocate.
Automating NPS surveys ensures timely collection of feedback, making it easier to:
- Measure Customer Loyalty: Track Net Promoter Score scores over time to understand overall sentiment.
- Take Immediate Action: Trigger alerts or create follow-up cases for detractors and passives.
- Enhance Customer Interactions: Associate NPS responses with Salesforce CRM contacts and accounts for more personalized engagement.
- Improve Business Outcomes: Use trend analysis to drive strategic decisions that boost retention and satisfaction.
- Notify Marketing for Promoters: Automatically alert marketing teams when customers leave high NPS scores, so they can leverage positive sentiment for referrals, testimonials, and advocacy campaigns.
With SurveyVista, setting up automated NPS surveys is simple, helping you continuously optimize the customer experience.
Avoid Survey Fatigue with Smart Throttling
Frequent surveys can overwhelm customers and lead to lower response rates. SurveyVista’s intelligent throttling feature ensures surveys are sent strategically, maximizing engagement without causing fatigue.
Seamless Salesforce CRM Integration for Actionable Insights
SurveyVista doesn’t just collect data—it makes it actionable. By integrating directly with your Salesforce CRM, NPS responses are linked to customer records, helping your team:
- View NPS scores alongside contact and account data.
- Identify at-risk customers and proactively address concerns.
- Personalize interactions based on customer sentiment.
Automate Reporting for Continuous Improvement
NPS isn’t just a one-time survey—it’s an ongoing process. With SurveyVista, you can:
- Monitor Trends: Track NPS scores over time to identify patterns.
- Generate Reports: View real-time dashboards in SurveyVista or your CRM.
- Trigger Alerts: Automatically notify managers when a customer submits a low score.
Implementing NPS Surveys in SurveyVista
Step 1: Install SurveyVista in Salesforce
The first step in automating your closed case surveys is to ensure that SurveyVista is installed with your Salesforce CRM.
If you haven’t done so already, install SurveyVista from the Salesforce AppExchange and configure it. Refer to the Getting Started – SurveyVista guide for step-by-step Instructions.
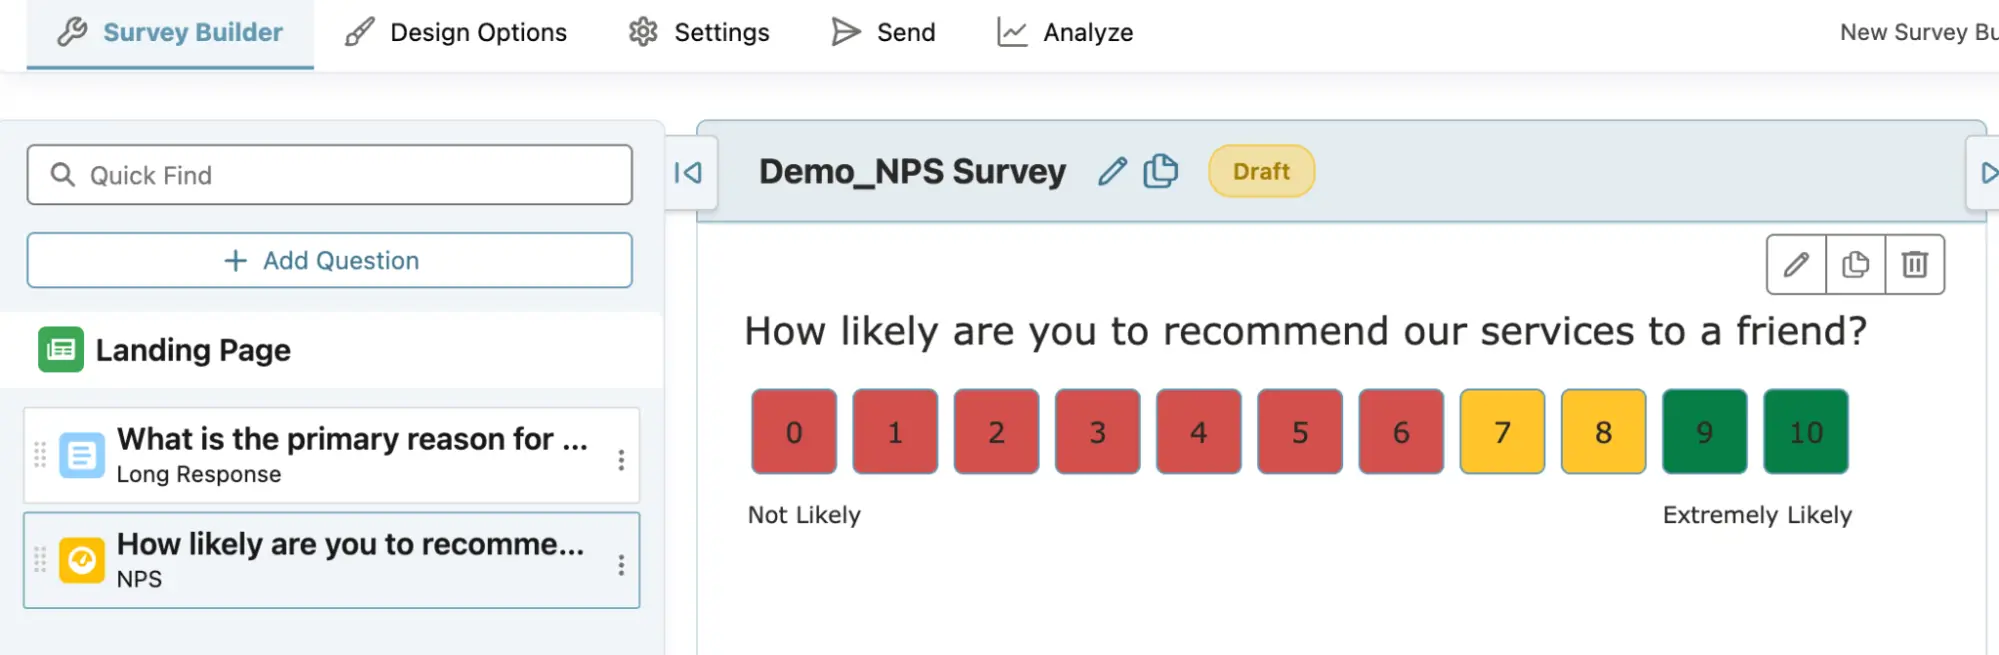
Step 2: Create an NPS Survey
- Create a survey
- Once you have installed the app, go to ‘Ardira Surveys’ from the menu bar, then click ‘New’ in the top right corner.

- After clicking on ‘New,’ a dialog box will appear, allowing you to choose whether to start a survey or create a form.
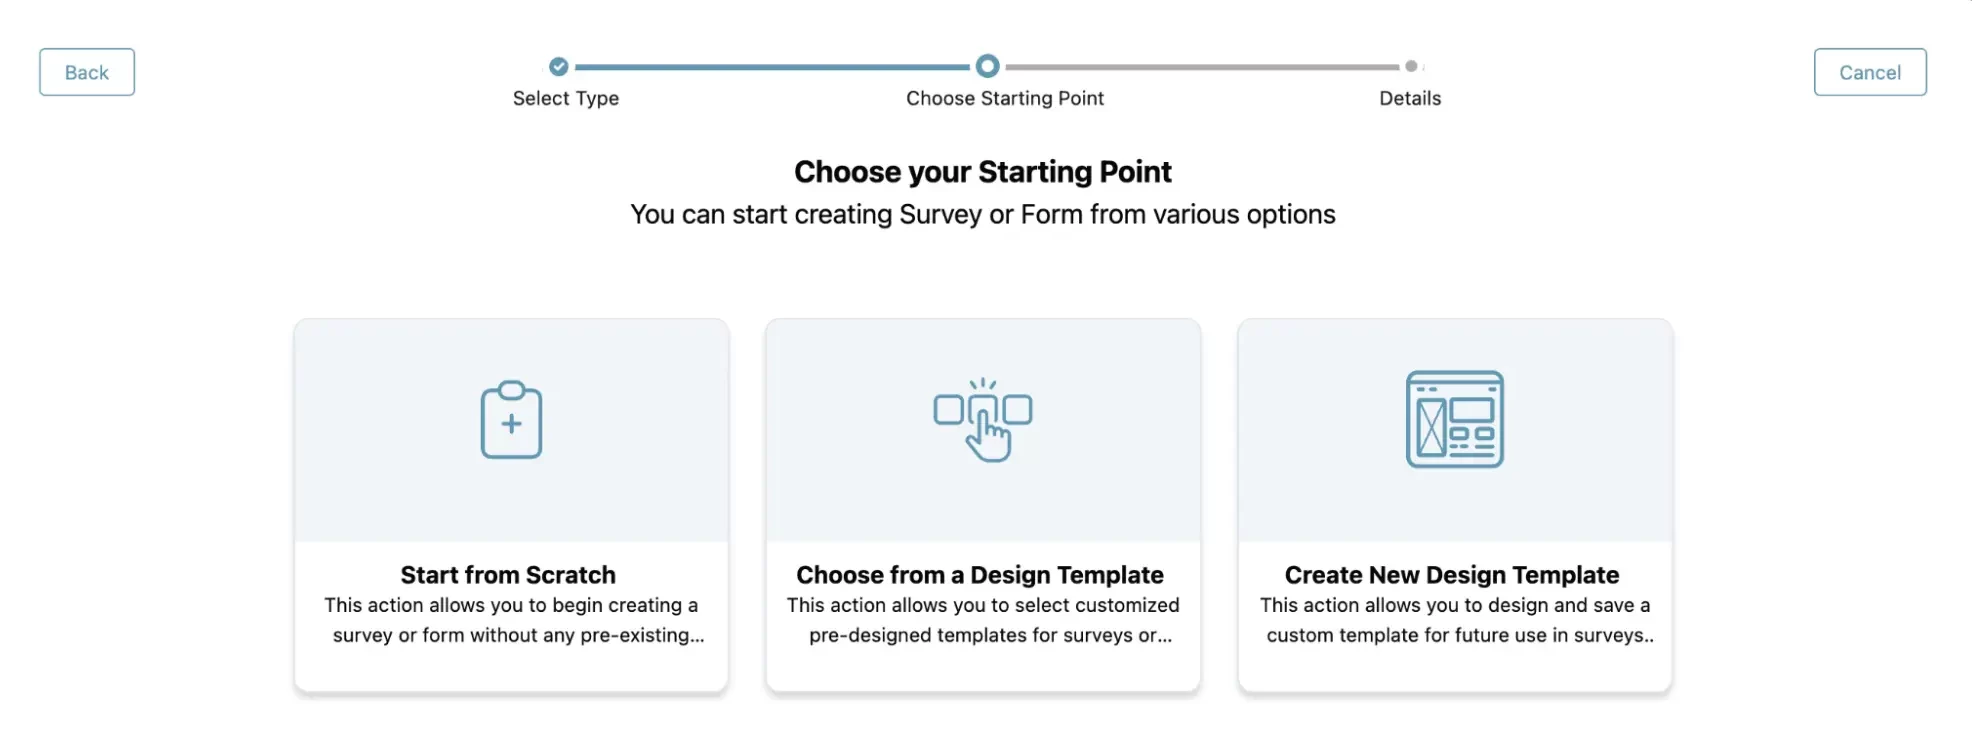
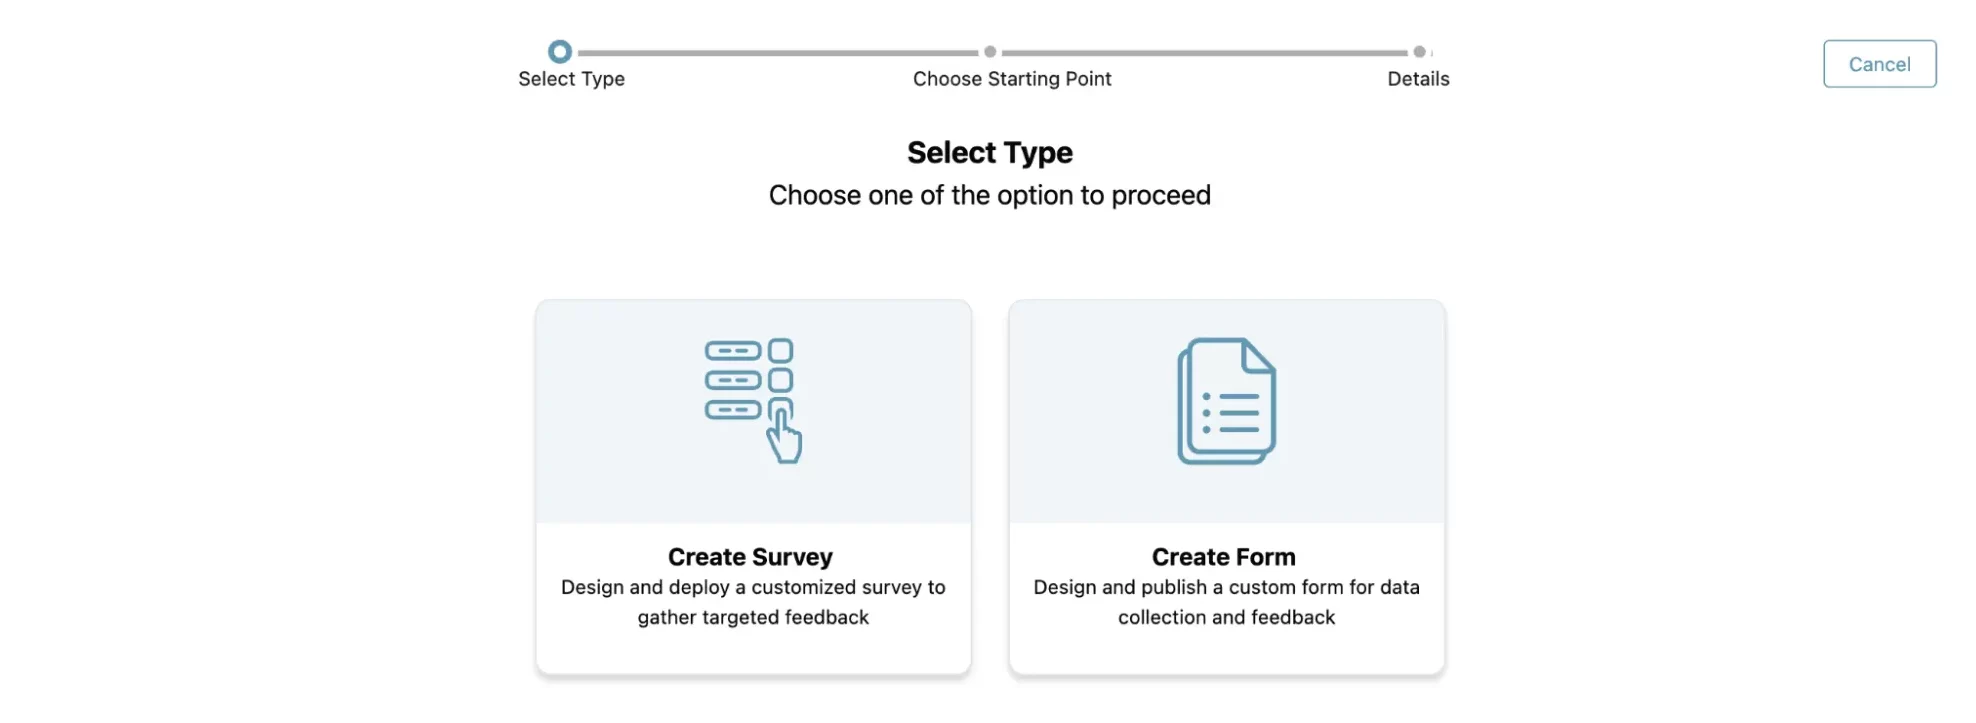 Once you select “Create Survey”, you can now select if you want to start a survey from scratch or choose from an existing design template.
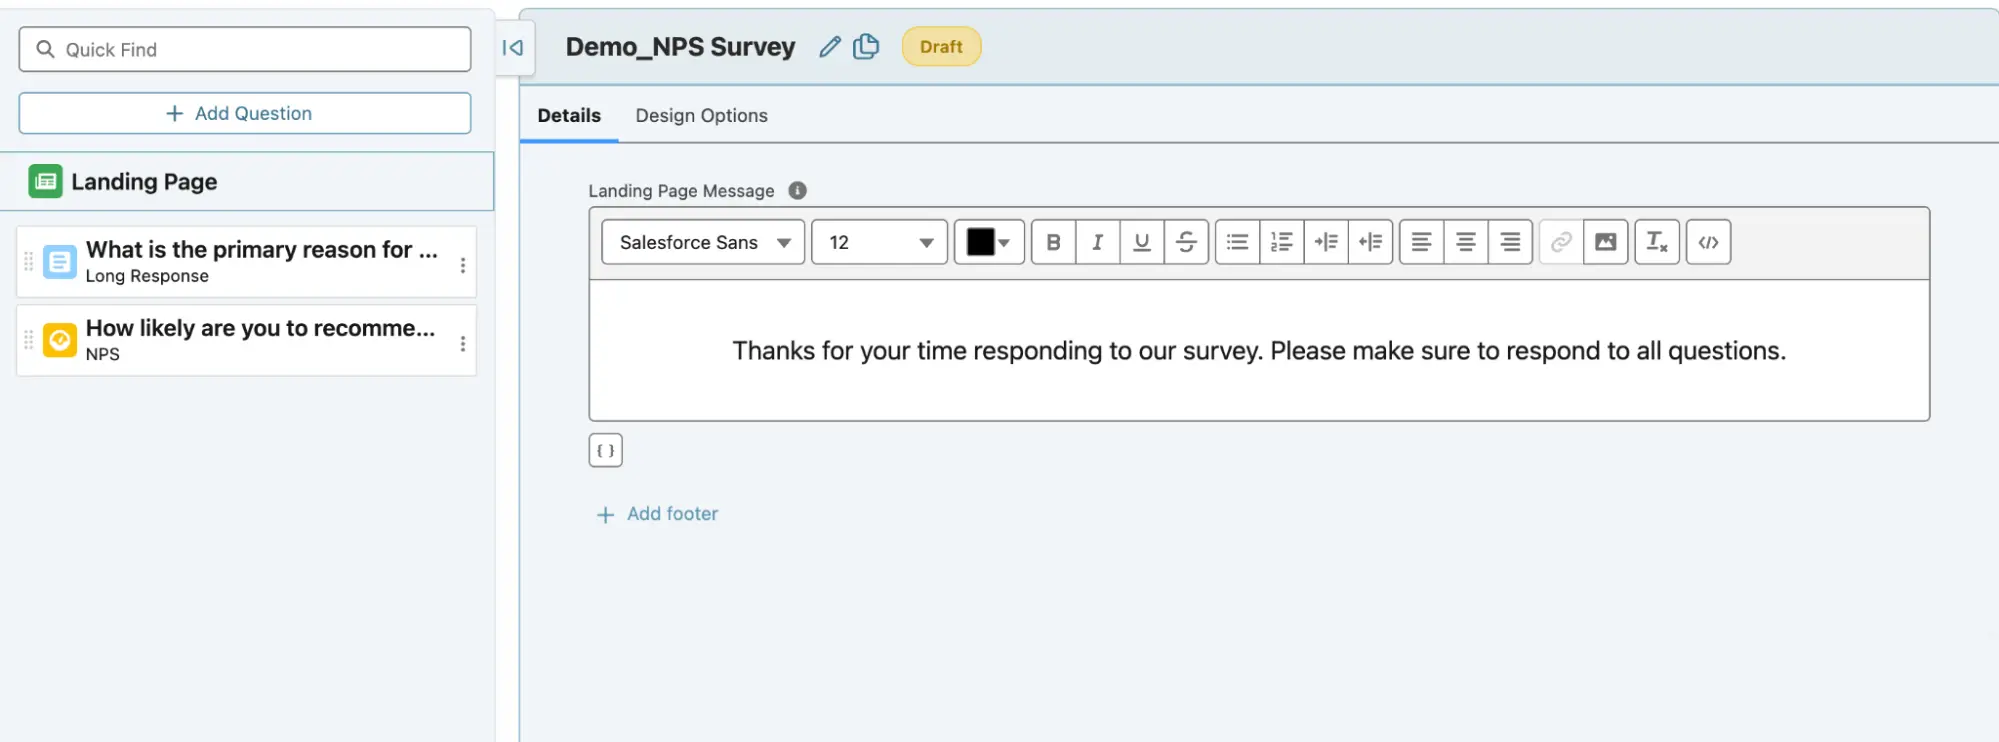
In the next step, name your survey.

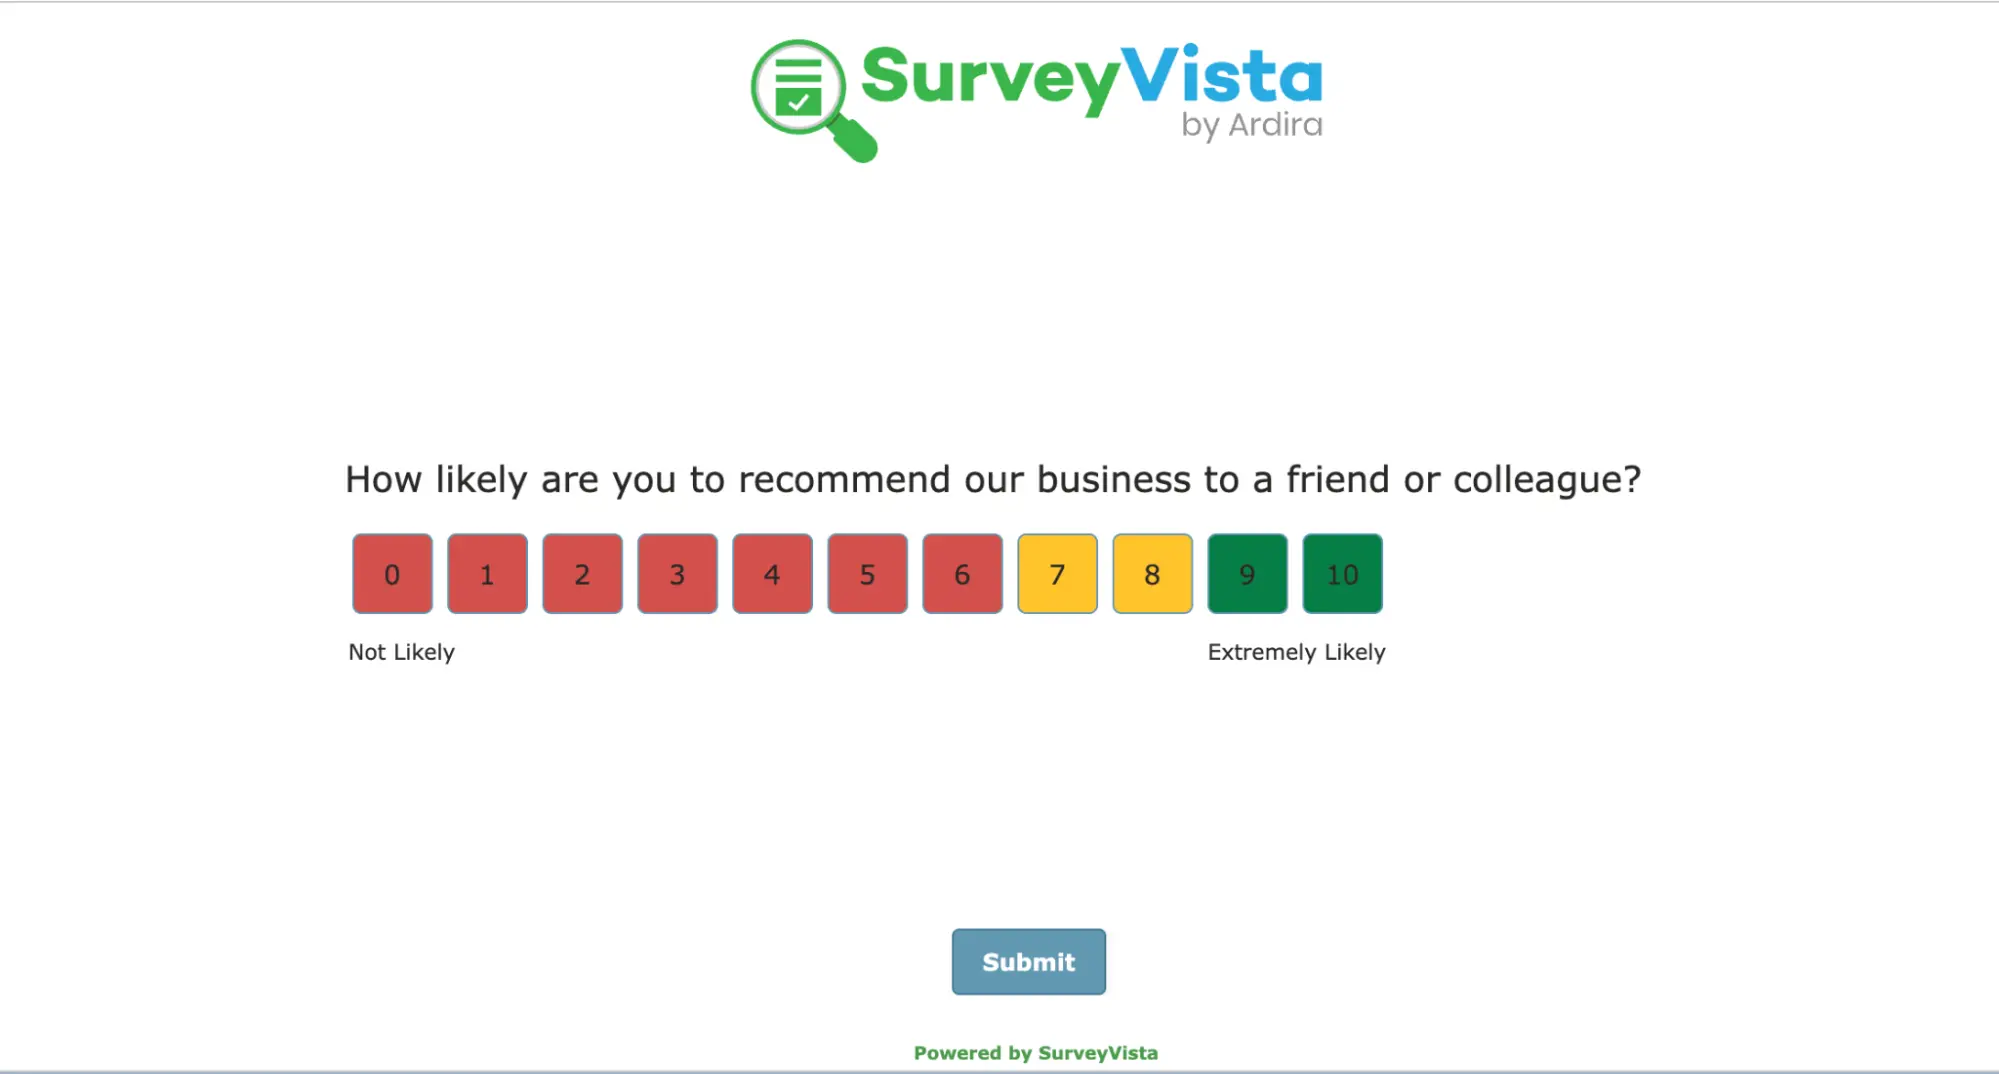
- After naming your survey, you will see options to build it by adding questions, designing its layout, and previewing how it will appear.
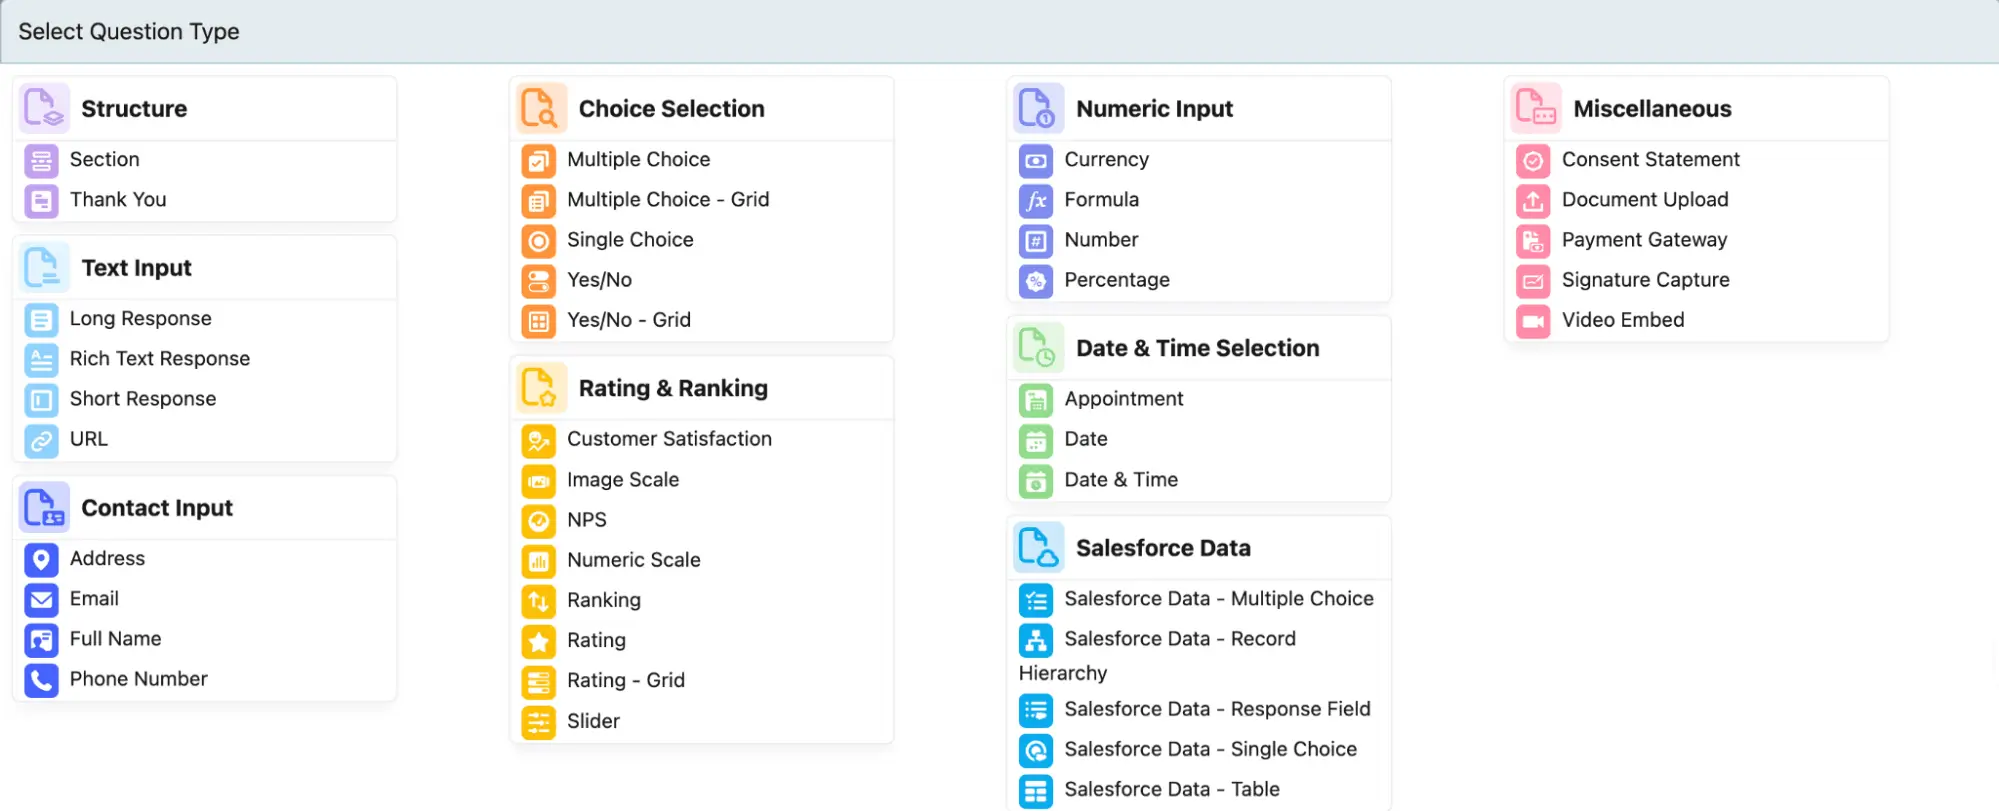
 After clicking on ‘Add Question,’ you will have the option to choose from multiple available question types based on your needs.
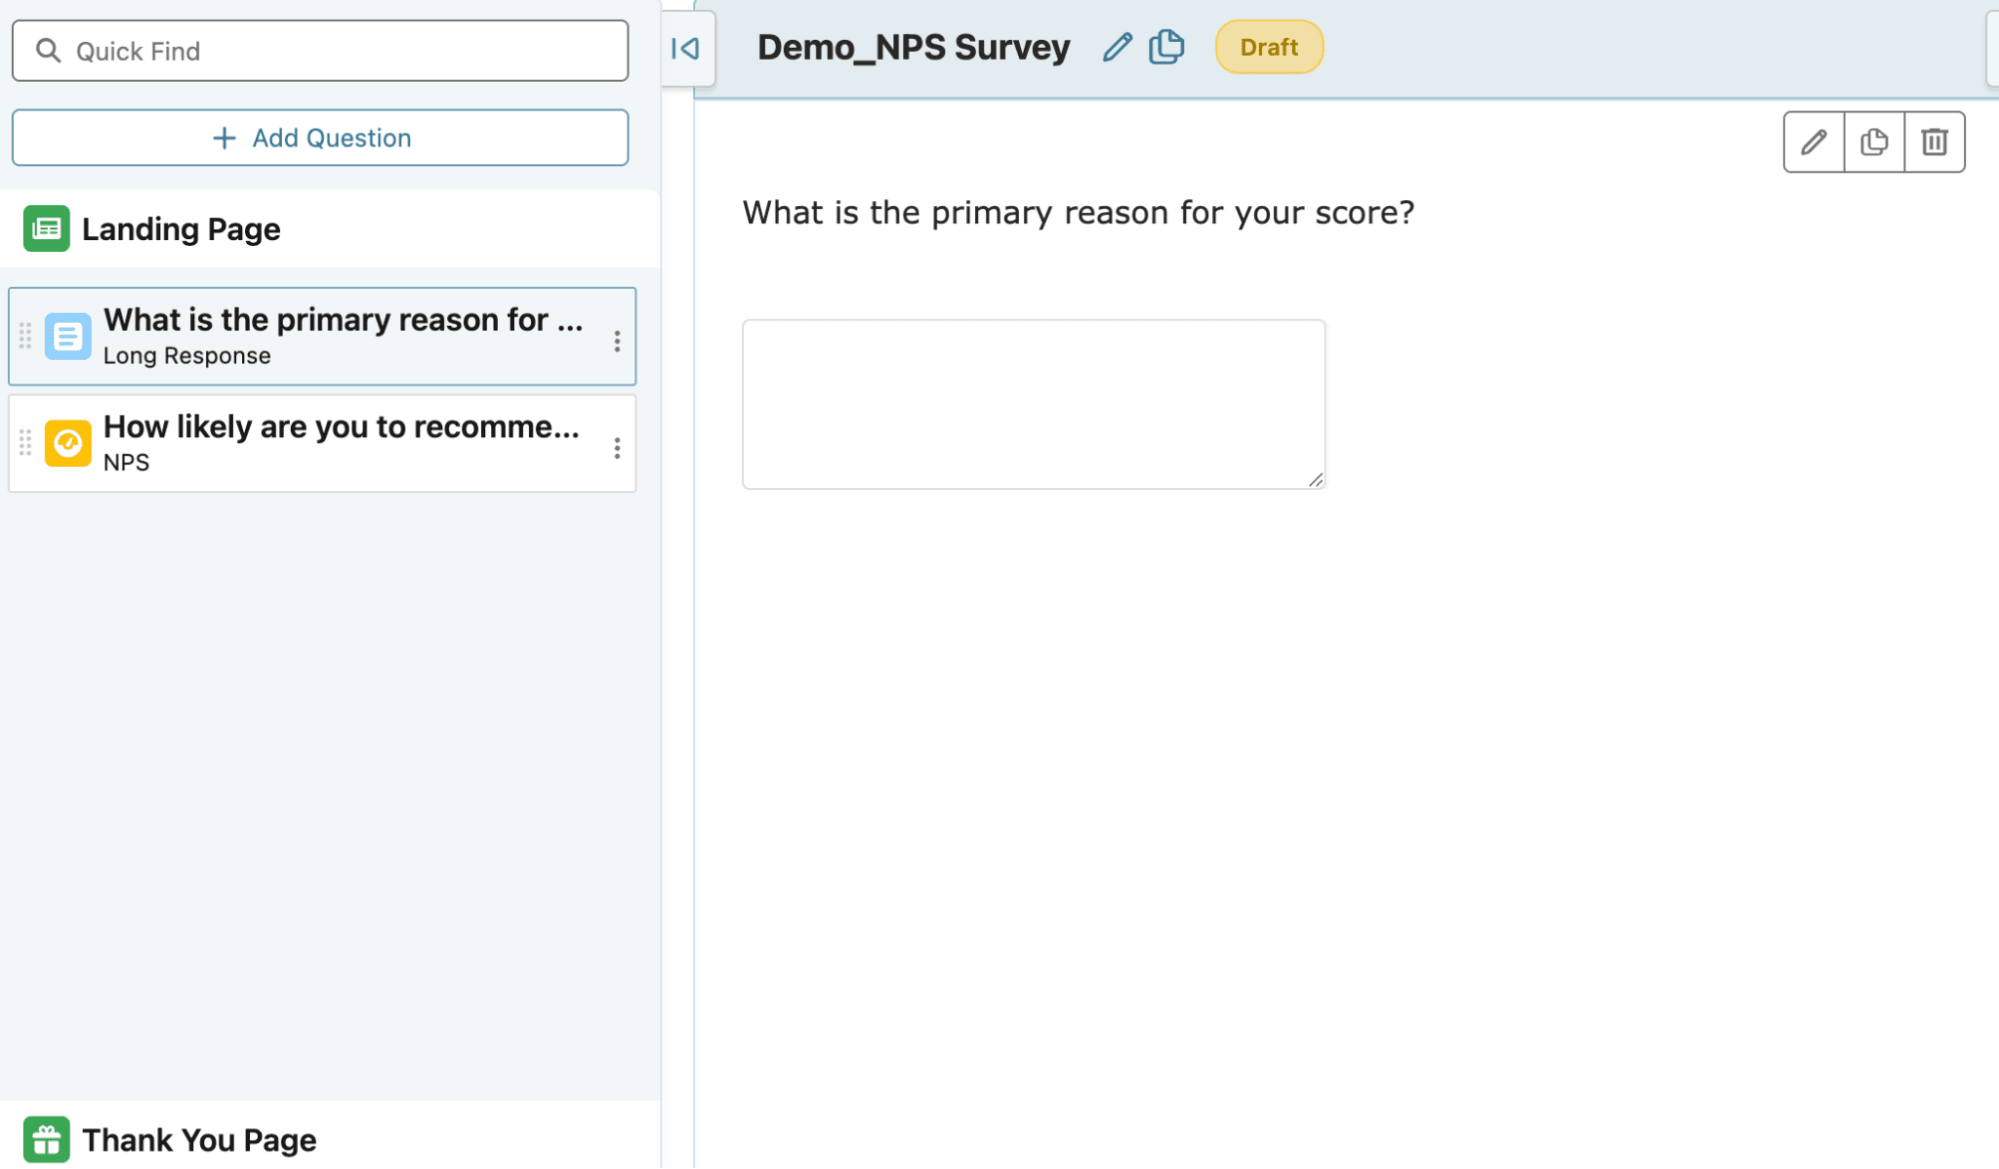
After selecting your question type, you can edit it by clicking the ‘pencil’ icon at the top of the question.
You can now edit the question, modify the question design, add details, and then click ‘Save’.
Add a customized ‘thank you’ message by clicking on ‘Thank you page’
 Tip: Personalize the survey and email templates with customer data.
- Once you have installed the app, go to ‘Ardira Surveys’ from the menu bar, then click ‘New’ in the top right corner.
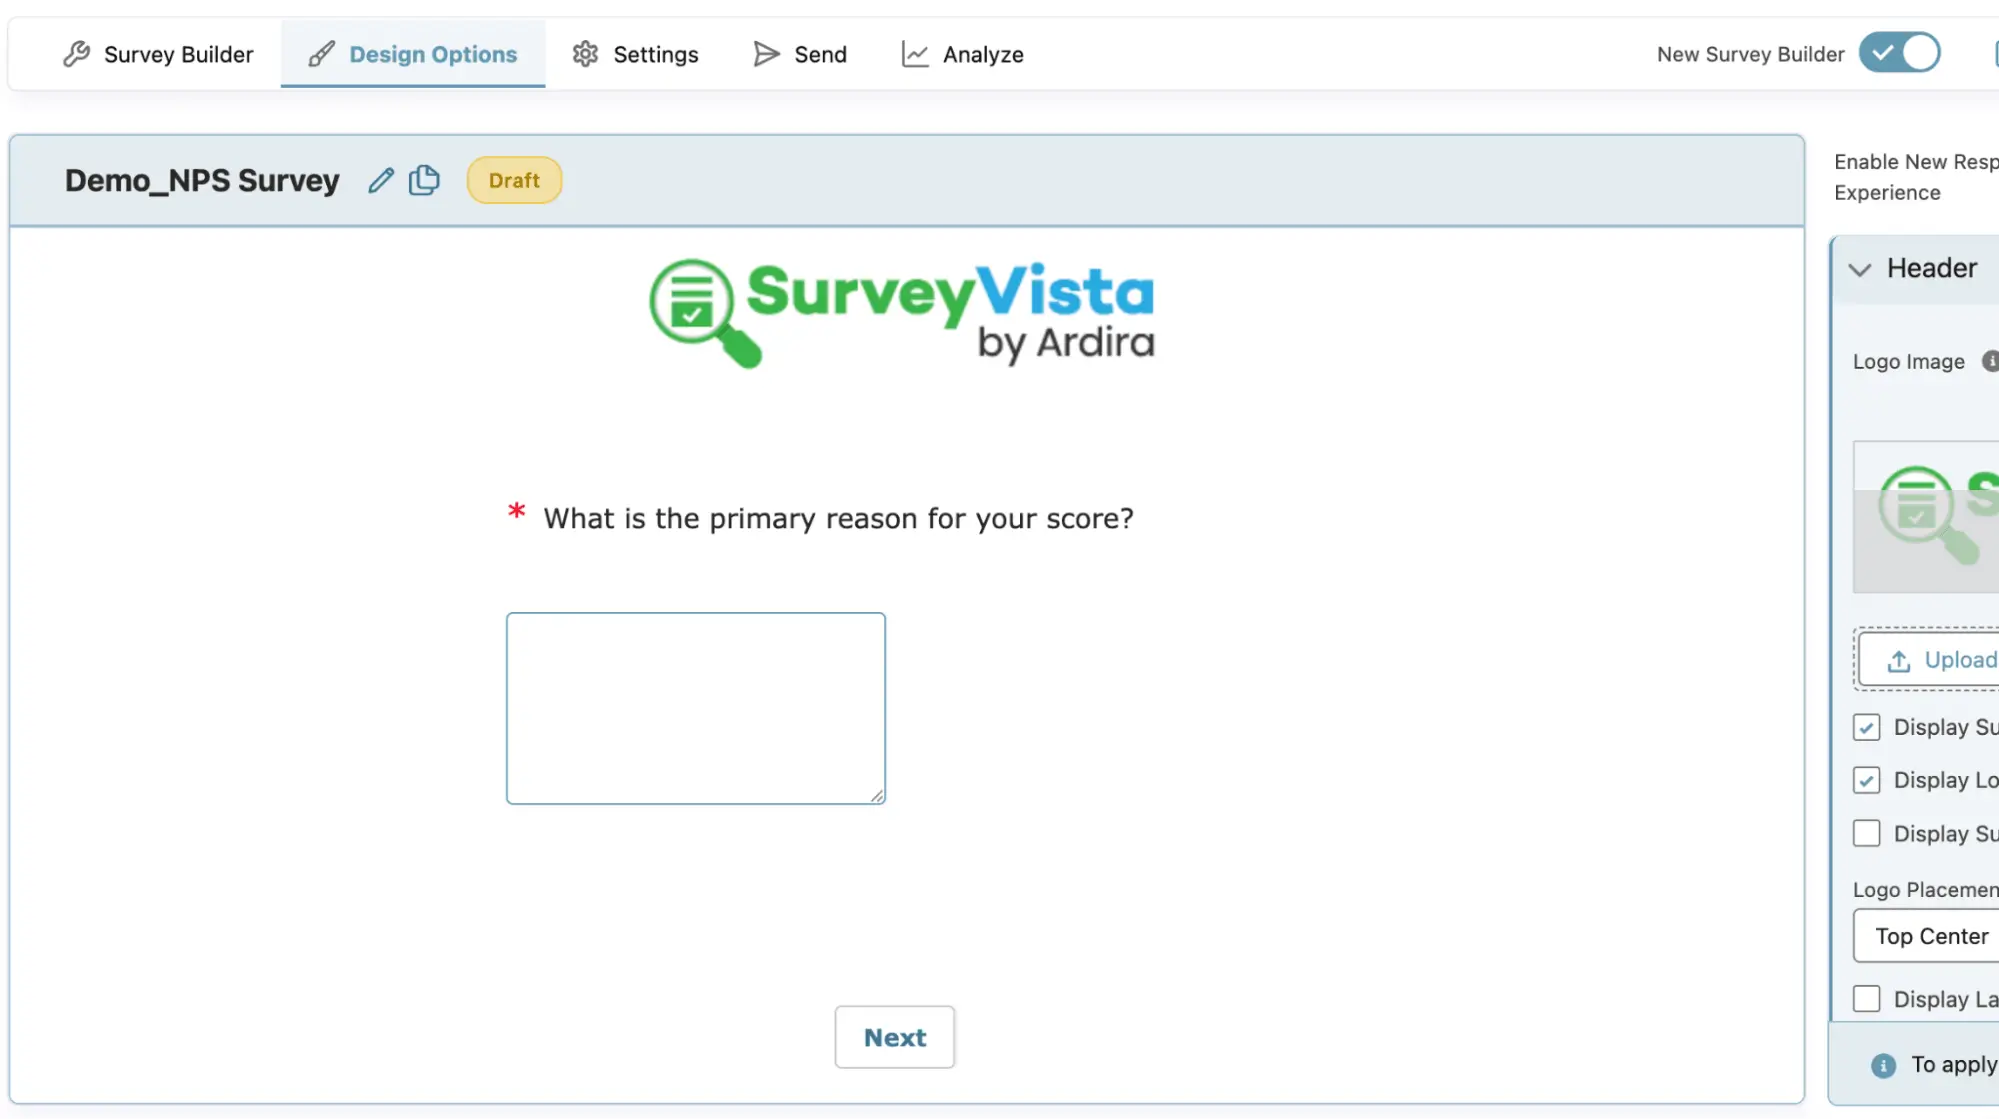
- Design survey for branding
- Once you have added all your questions to the survey, you can proceed to design it, in “Design Options” tab. You can customize the background, adjust the header and footer appearance, change the color of the ‘Submit’ button (or if you want to change the button altogether), and more.
- Modify the survey landing page (aka welcome page) and footer messages by clicking on ‘Landing Page’ in the ‘Build’ tab.
You can add text, image or link in the footer based on your preferences.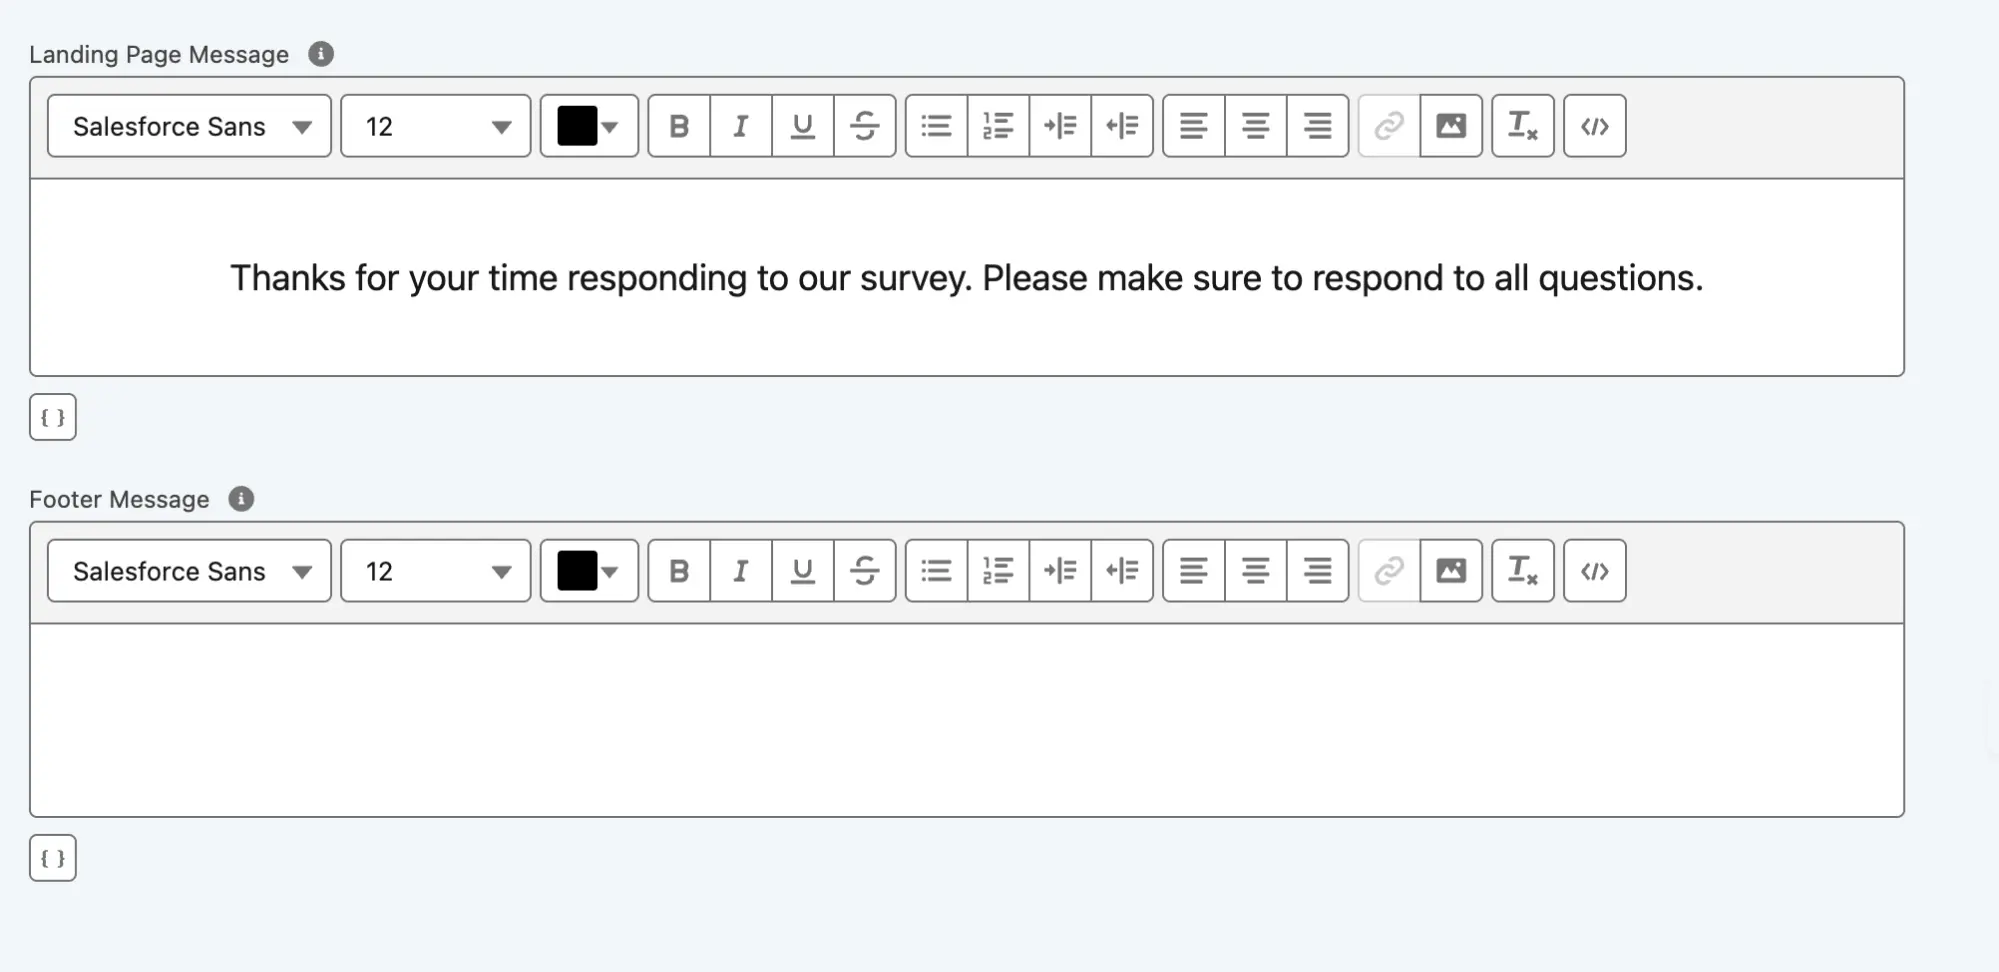
- Go to ‘Settings’ from the menu bar to access advanced options such as Question Dependency, Response Mapping, copying the survey link, and more
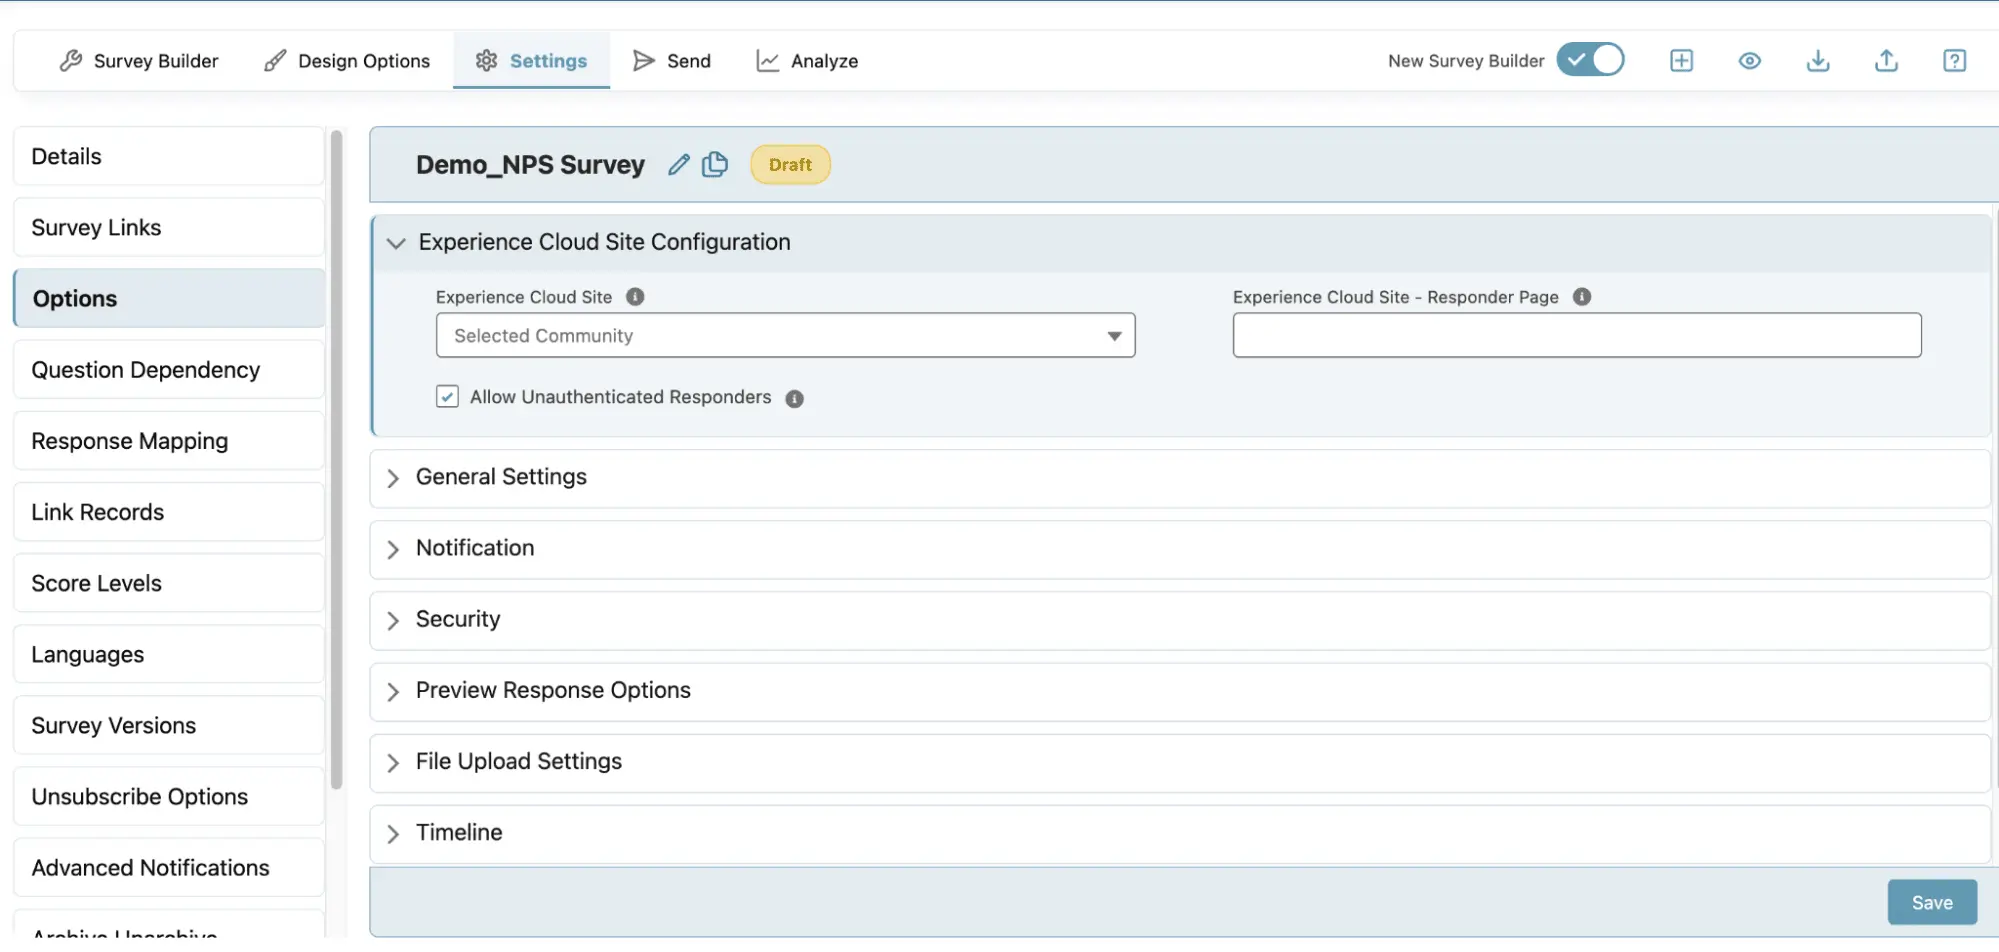 For advanced features, check out the Survey settings
 - Preview on Mobile & Desktop
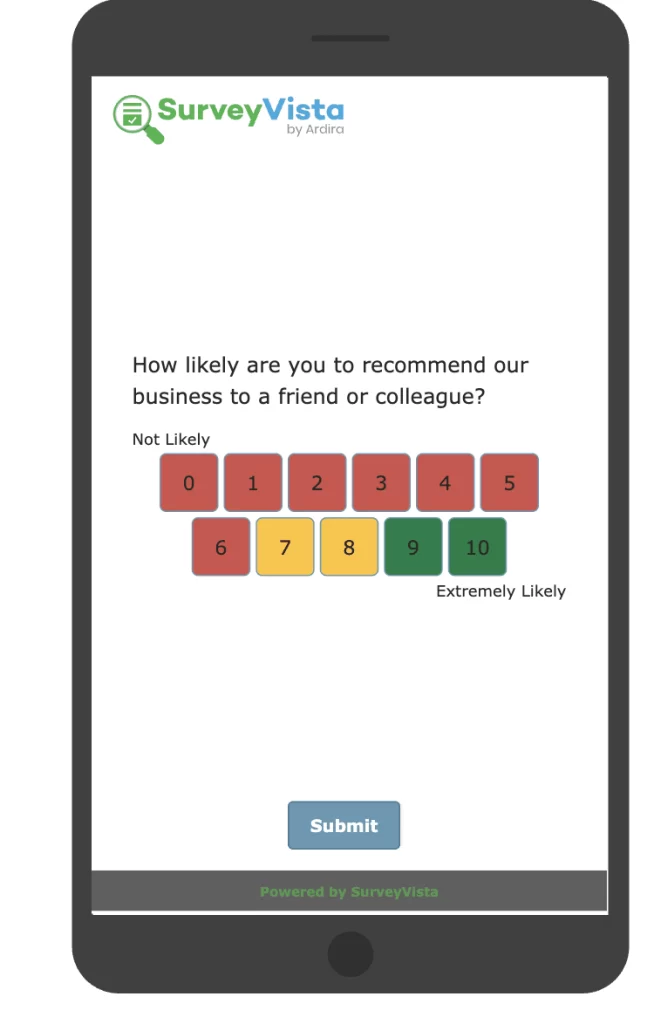 To understand the in-depth designing features available, refer to Design Options.
- Once you have added all your questions to the survey, you can proceed to design it, in “Design Options” tab. You can customize the background, adjust the header and footer appearance, change the color of the ‘Submit’ button (or if you want to change the button altogether), and more.
Step 3: Automate NPS Survey Distribution
- Use Salesforce Flow to send NPS surveys at key moments (e.g., post-purchase, after onboarding, or periodically).
- Enable throttling to prevent over-surveying customers.
- Alternatively use SurveyVista Record Lifecycle Maps (RLM) to automatically send NPS surveys at predefined trigger points, such as case resolution, post-purchase, or contract renewal, ensuring feedback is collected at the most impactful moments.
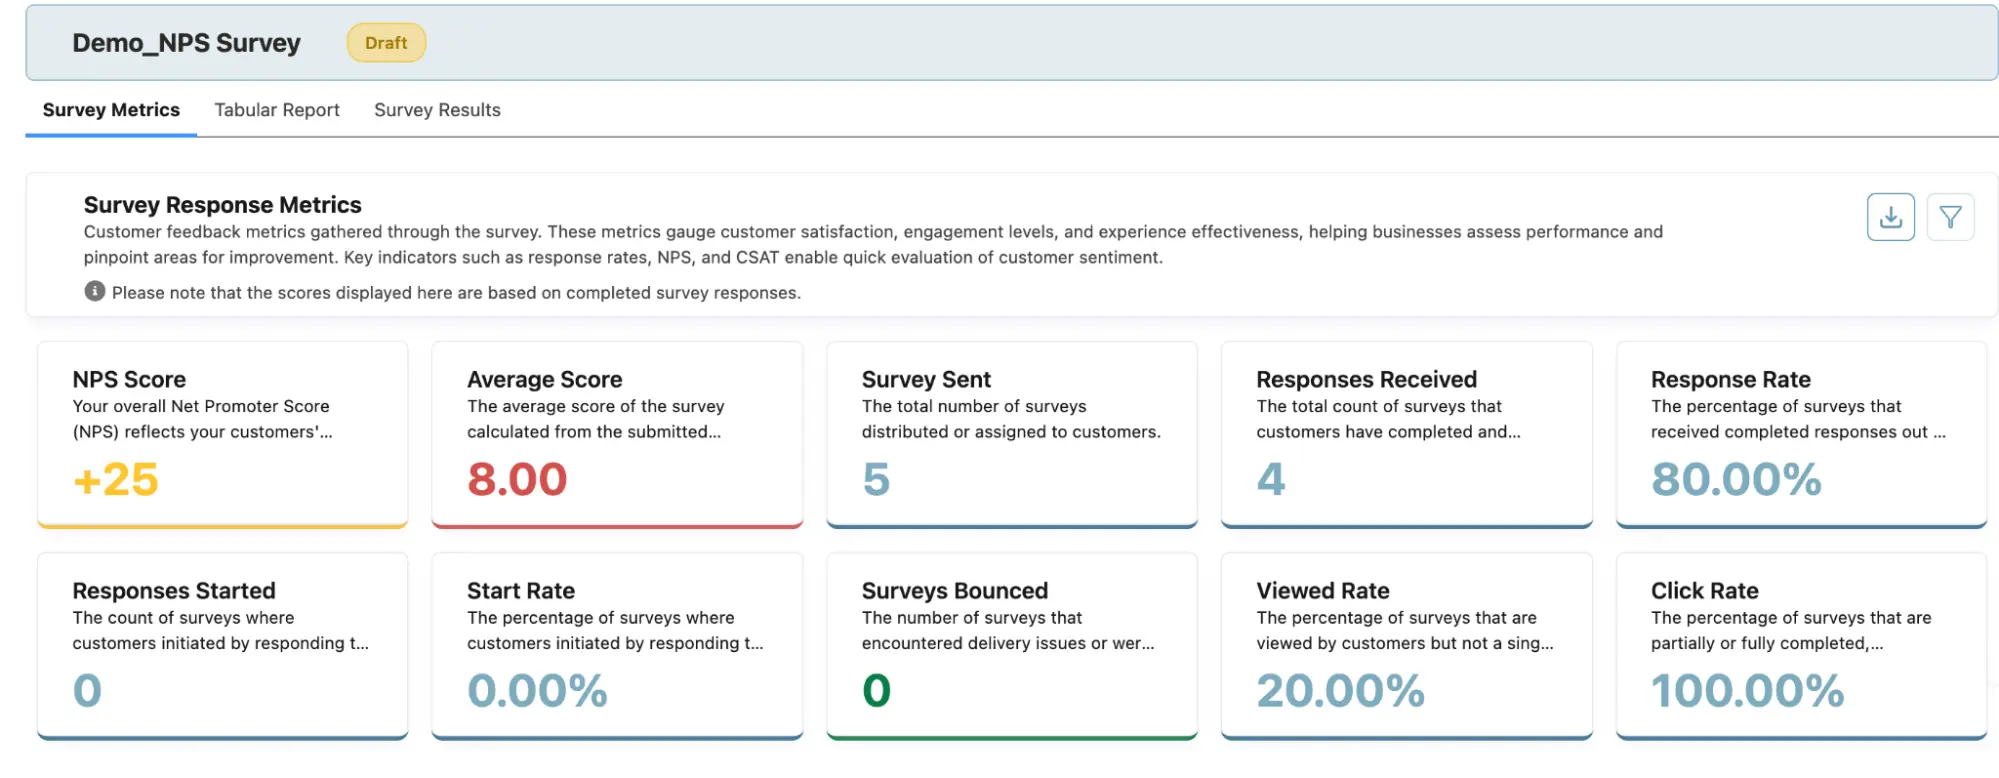
Step 4: Analyze and Act on NPS Results
Once the survey responses are collected, use SurveyVista’s built-in metrics tools and Salesforce reports & dashboards to analyze the data.
How to Analyze and Act on the Results:
- Dashboard Analytics:
- Use SurveyVista’s metrics tools to identify trends and common pain points.
- Open the survey in survey builder and click “Analyze” action. Refer to Survey Metrics – SurveyVista
- You can export survey responses in an excel file using the Tabular Report functionality.
Salesforce Dashboards:
- Map survey responses to Salesforce records (e.g., Accounts, Contacts, Opportunities, Custom Objects) for better customer segmentation.
- Visualize NPS trends, customer sentiment, and feedback actionable results within Salesforce dashboards.
- Integrate survey data into existing Salesforce reports to track feedback impact on sales, retention, and customer satisfaction.
Step 5: Take Actions to Improve Business outcomes based on Feedback
Feedback insights only matter if they drive action. With SurveyVista, acting on feedback is effortless:
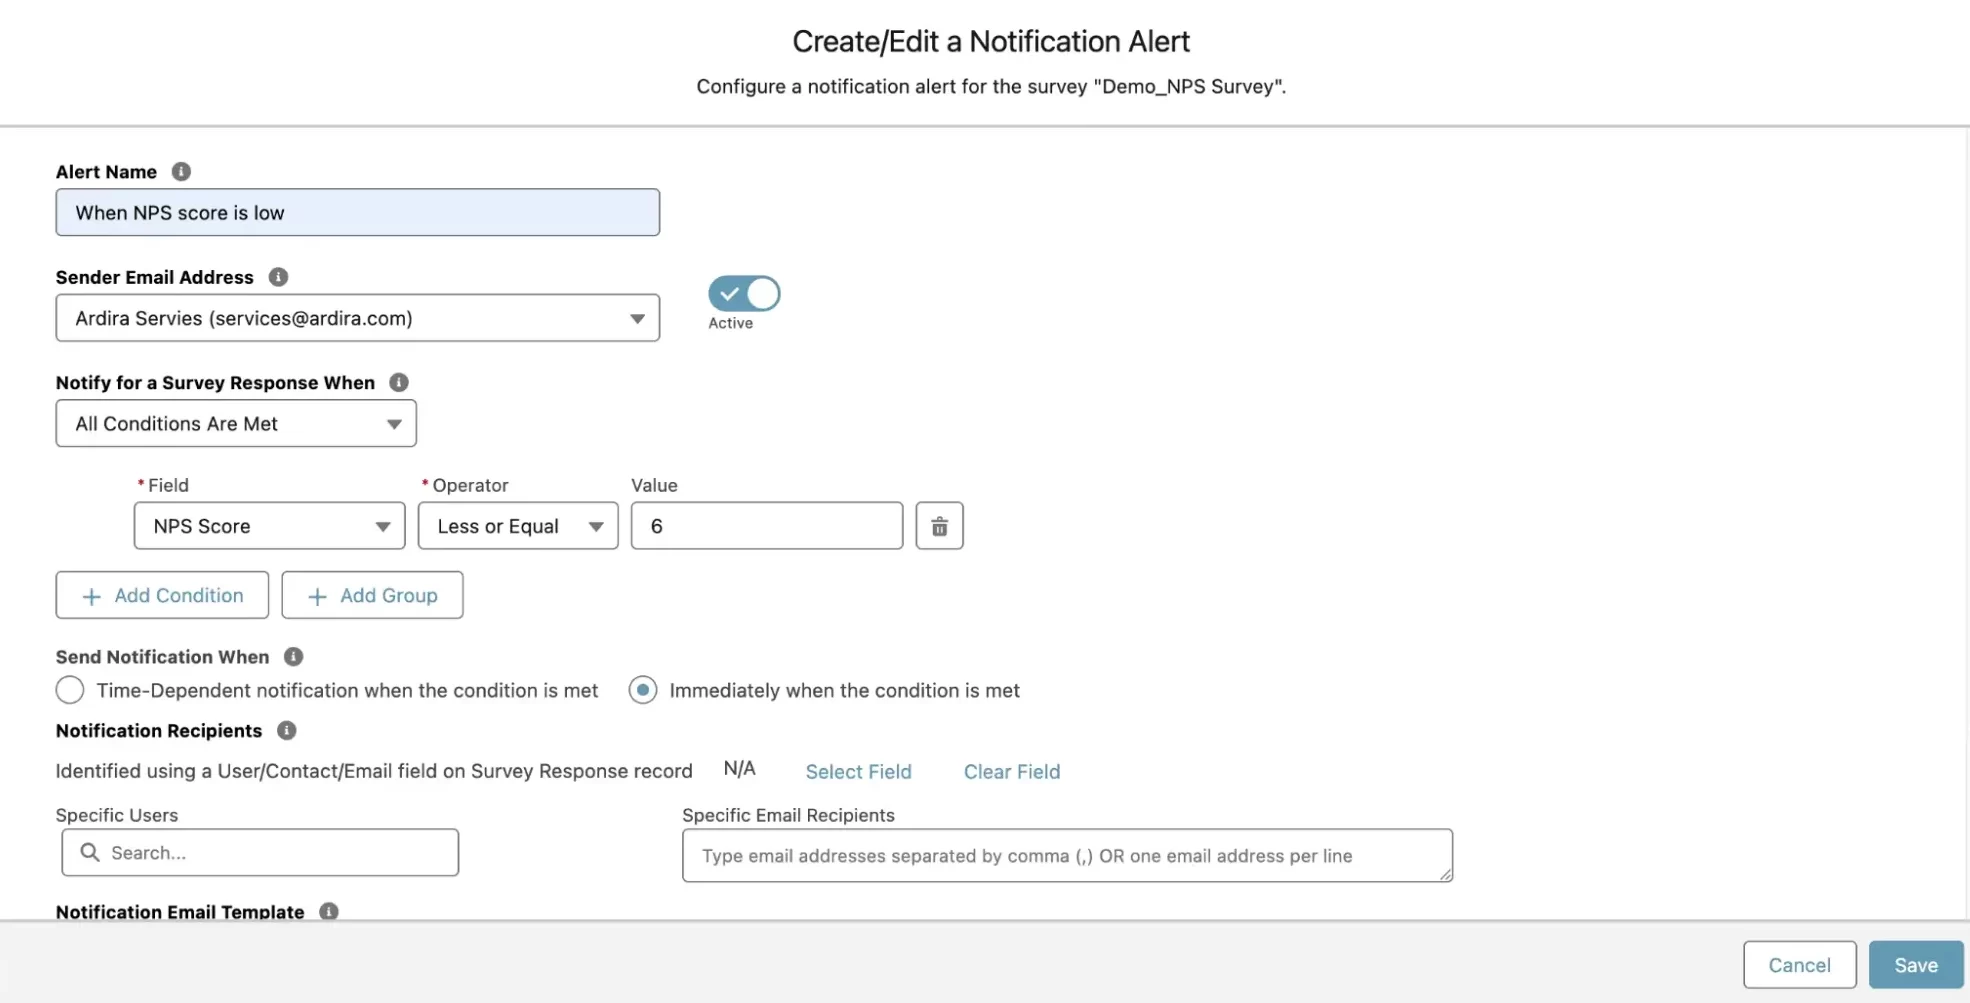
- Automated Alerts
- Set up email alerts based on survey responses. For example, if a customer indicates dissatisfaction, an automatic alert can be sent to a support manager for immediate follow-up.
Use SurveyVista’s “Advanced Alerts Notification” feature to configure alerts based on feedback criteria. Refer to Schedule Future Notification with Advanced Notification.
To set advanced notification alerts, go to “Settings” and then navigate to the “Advanced Notifications” tab in the left-hand menu.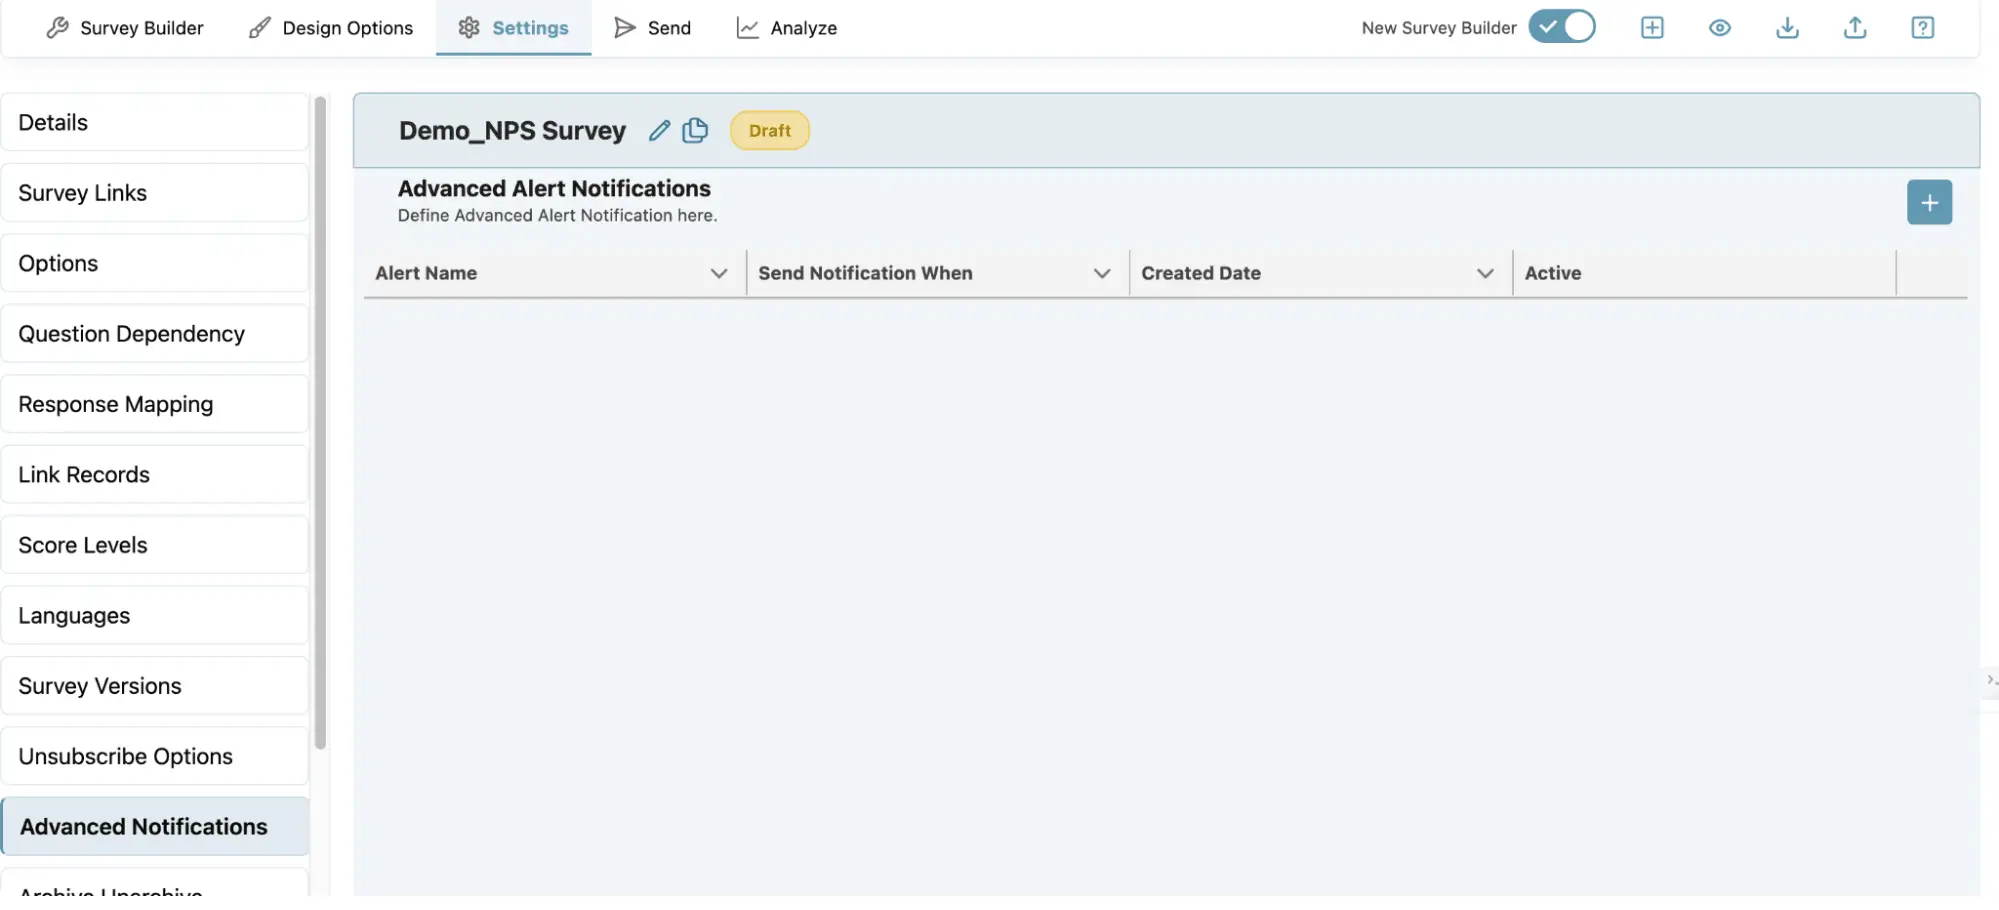
Click on the “+” sign to create a notification alert.
About SurveyVista
SurveyVista is a 100% native Salesforce solution for surveys, forms, and assessments, revolutionizing how businesses collect, integrate, understand, and act on feedback—securely and in real time, all within Salesforce.
Ready to see SurveyVista in action? Schedule a demo with our solution engineers today!
More Like This


Rajesh Unadkat 
Founder and CEO
Rajesh is the visionary leader at the helm of SurveyVista. With a profound vision for the transformative potential of survey solutions, he founded the company in 2020. Rajesh's unwavering commitment to harnessing the power of data-driven insights has led to SurveyVista's rapid evolution as an industry leader.
Connect with Rajesh on LinkedIn to stay updated on the latest insights into the world of survey solutions for customer and employee experience management.