
share: 


A seamless support experience starts with an efficient ticketing system. Are you making it easy for customers to reach out?
A Web-based Ticket Form is the first step in resolving customer issues, answering inquiries, and ensuring smooth service requests. It captures essential details about a customer’s concern, enabling support teams to respond efficiently. By embedding a SurveyVista Ticket Form on your support website, you can simplify issue reporting, automate workflows, and enhance customer service operations—all while keeping data within your Salesforce CRM.
In this blog, we’ll explore how SurveyVista’s Ticket Form can improve your ticketing process, integrate seamlessly with Salesforce CRM Integration, and provide real-time actionable insights to optimize support performance.
Why a Ticket Form in SurveyVista?
Imagine this: A customer encounters an issue and needs help. Instead of searching for contact details or waiting on hold, they fill out a simple, structured embedded Ticket Form on your support website. Their request is instantly routed to the right support team and visible in Salesforce, complete with all necessary details, ensuring a faster resolution.
Embedding your Ticket Form from SurveyVista ensures:
- Efficient Ticket Management: Capture all relevant details upfront, reducing back-and-forth clarifications.
- Seamless Salesforce CRM Integration: Link customer issues directly to contacts, cases, and accounts in Salesforce.
- Automated Workflows: Trigger actions like case creation, assignment, and follow-ups.
- Improved Customer Experience: Make it easy for customers to request support without friction.
With SurveyVista, setting up and managing a Ticket Form is effortless, streamlining your support processes while ensuring quick resolutions.
Create a Seamless Support Experience with a Ticket Form
A well-designed Ticket Form reduces frustration and helps support teams deliver fast, effective assistance. Key benefits include:
- Customized Forms: Tailor your form fields to capture the exact details your team needs.
- Conditional Logic: Display relevant questions based on the type of issue reported.
- Branding & Design Control: Maintain a consistent look and feel with your support website.
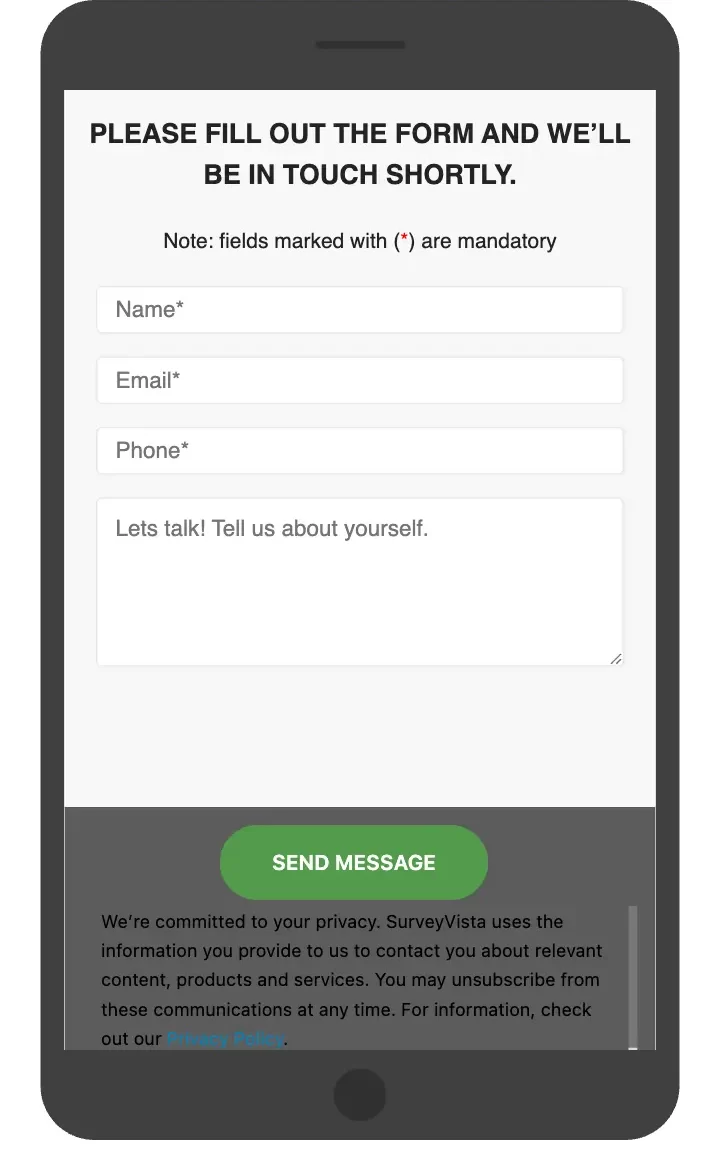
- Mobile-Friendly Experience: Ensure customers can submit tickets from any device.
Seamless Salesforce CRM Integration for Better Case Management
SurveyVista’s embedded Ticket Forms don’t just collect information—they integrate directly into Salesforce CRM Integration, allowing your team to:
- Automatically Create Cases based on form submissions.
- Associate Tickets with Customer Records for a complete interaction history.
- Prioritize and Assign Tickets based on issue type, urgency, or customer value.
Automate Reporting for Real-Time Insights
Tracking support trends is essential for continuous improvement. With SurveyVista, a 100% native Salesforce CRM Integration, you can:
- Monitor Ticket Volume: Track how many issues are submitted and resolved over time.
- Analyze Common Issues: Identify trends and recurring problems to improve service.
- Generate Custom Reports: View key support metrics in SurveyVista or Salesforce dashboards.
How to Implement a Ticket Form in SurveyVista
Step 1: Install SurveyVista in Salesforce
The first step in automating your closed case surveys is to ensure that SurveyVista is installed with your Salesforce CRM Integration.
If you haven’t done so already, install SurveyVista from the Salesforce AppExchange and configure it. Refer to the Getting Started – SurveyVista guide for step-by-step Instructions.
Step 2: Create a New Form in SurveyVista
-
Create a form
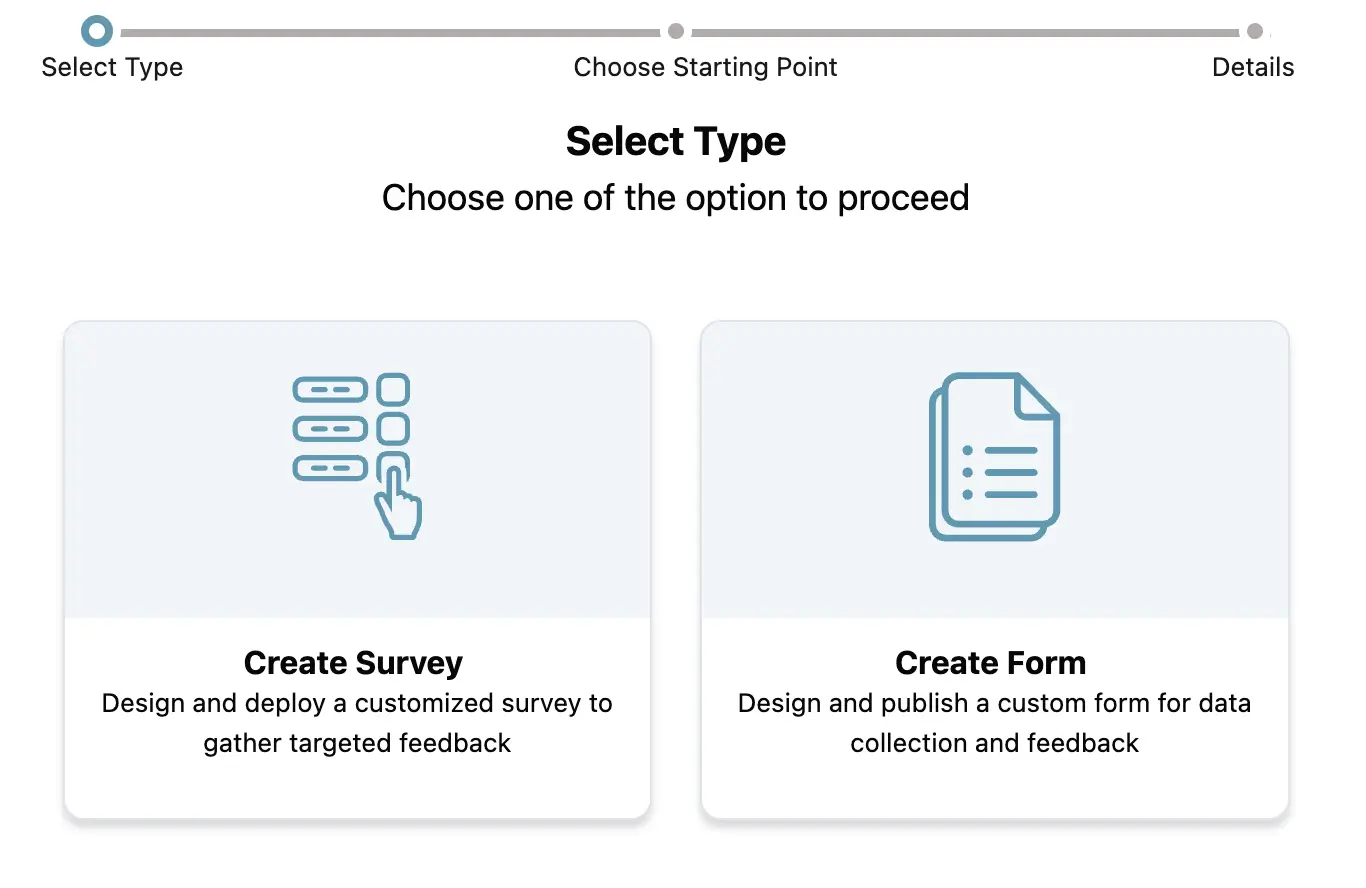
- Once you have installed the app, go to ‘Ardira Surveys’ from the menu bar, then click ‘New’ in the top right corner.

After clicking on ‘New,’ a dialog box will appear, allowing you to choose whether to start a survey or create a form.
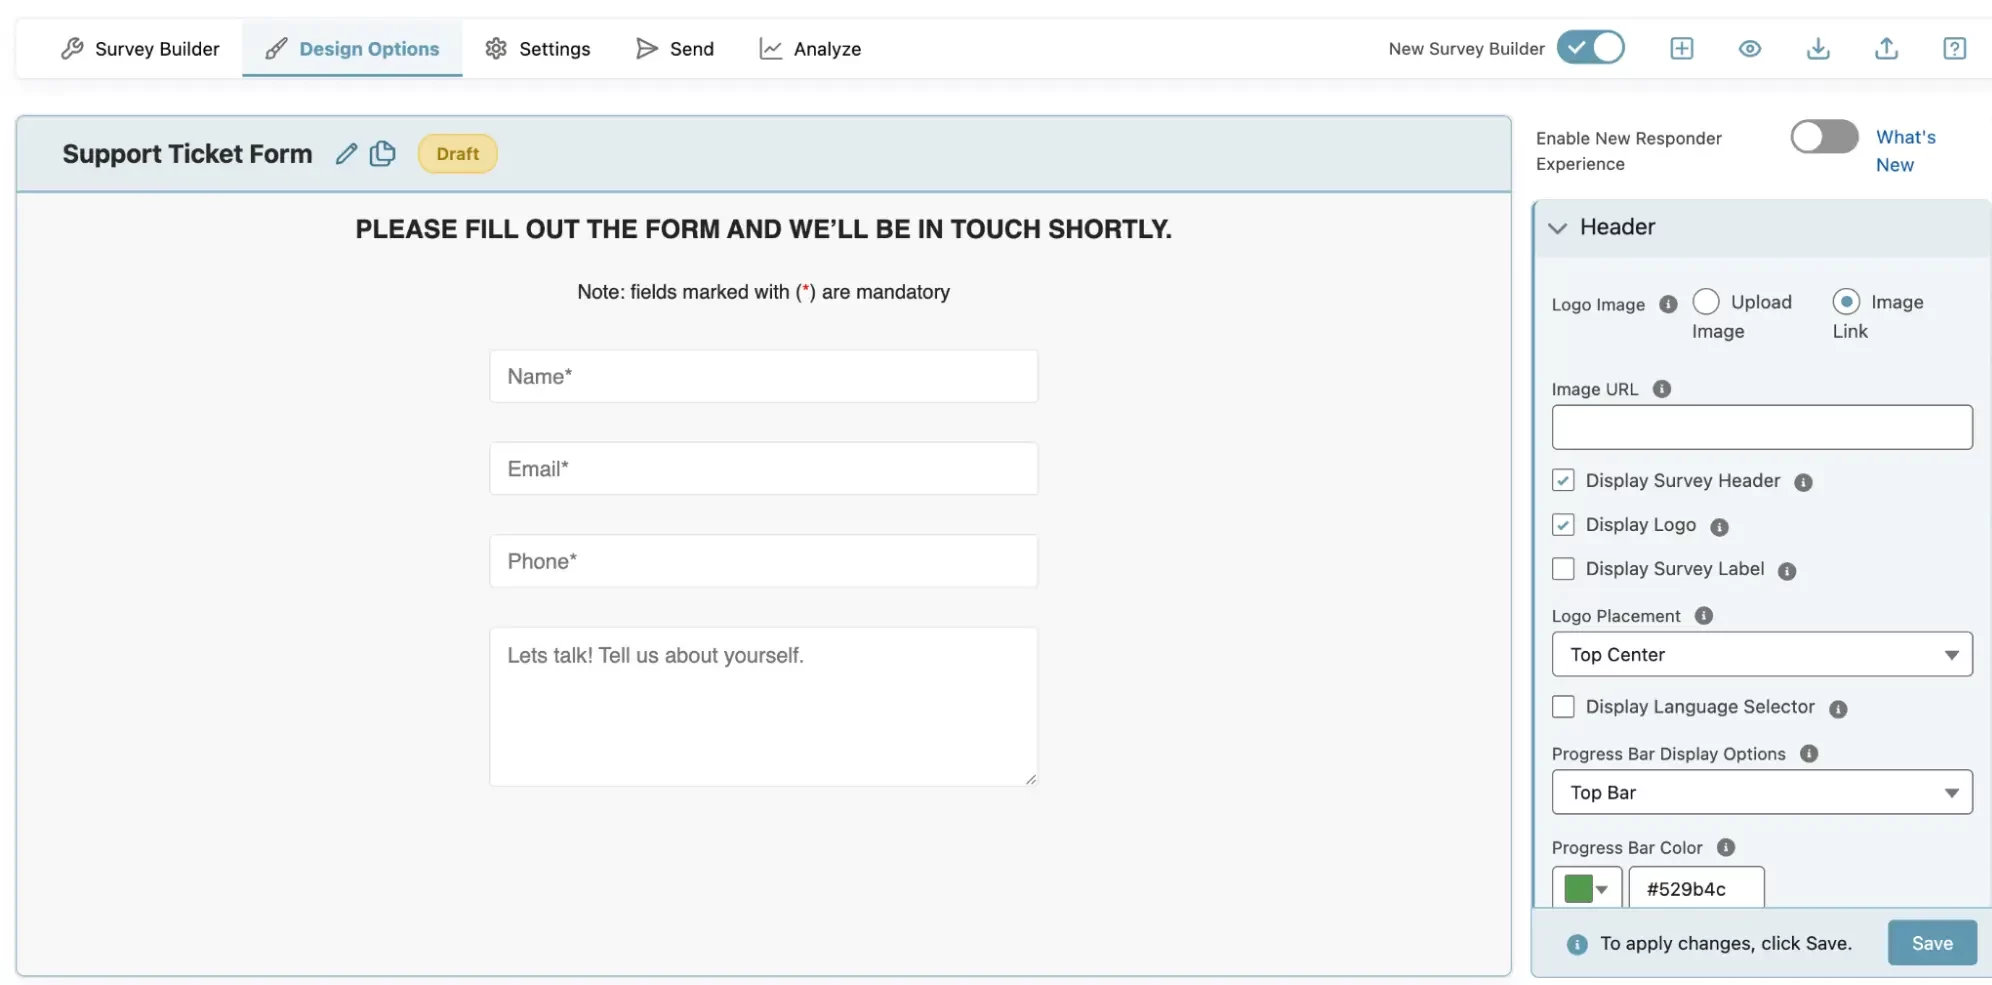
Select ‘Create Form’ and name it “Support Ticket Form”.
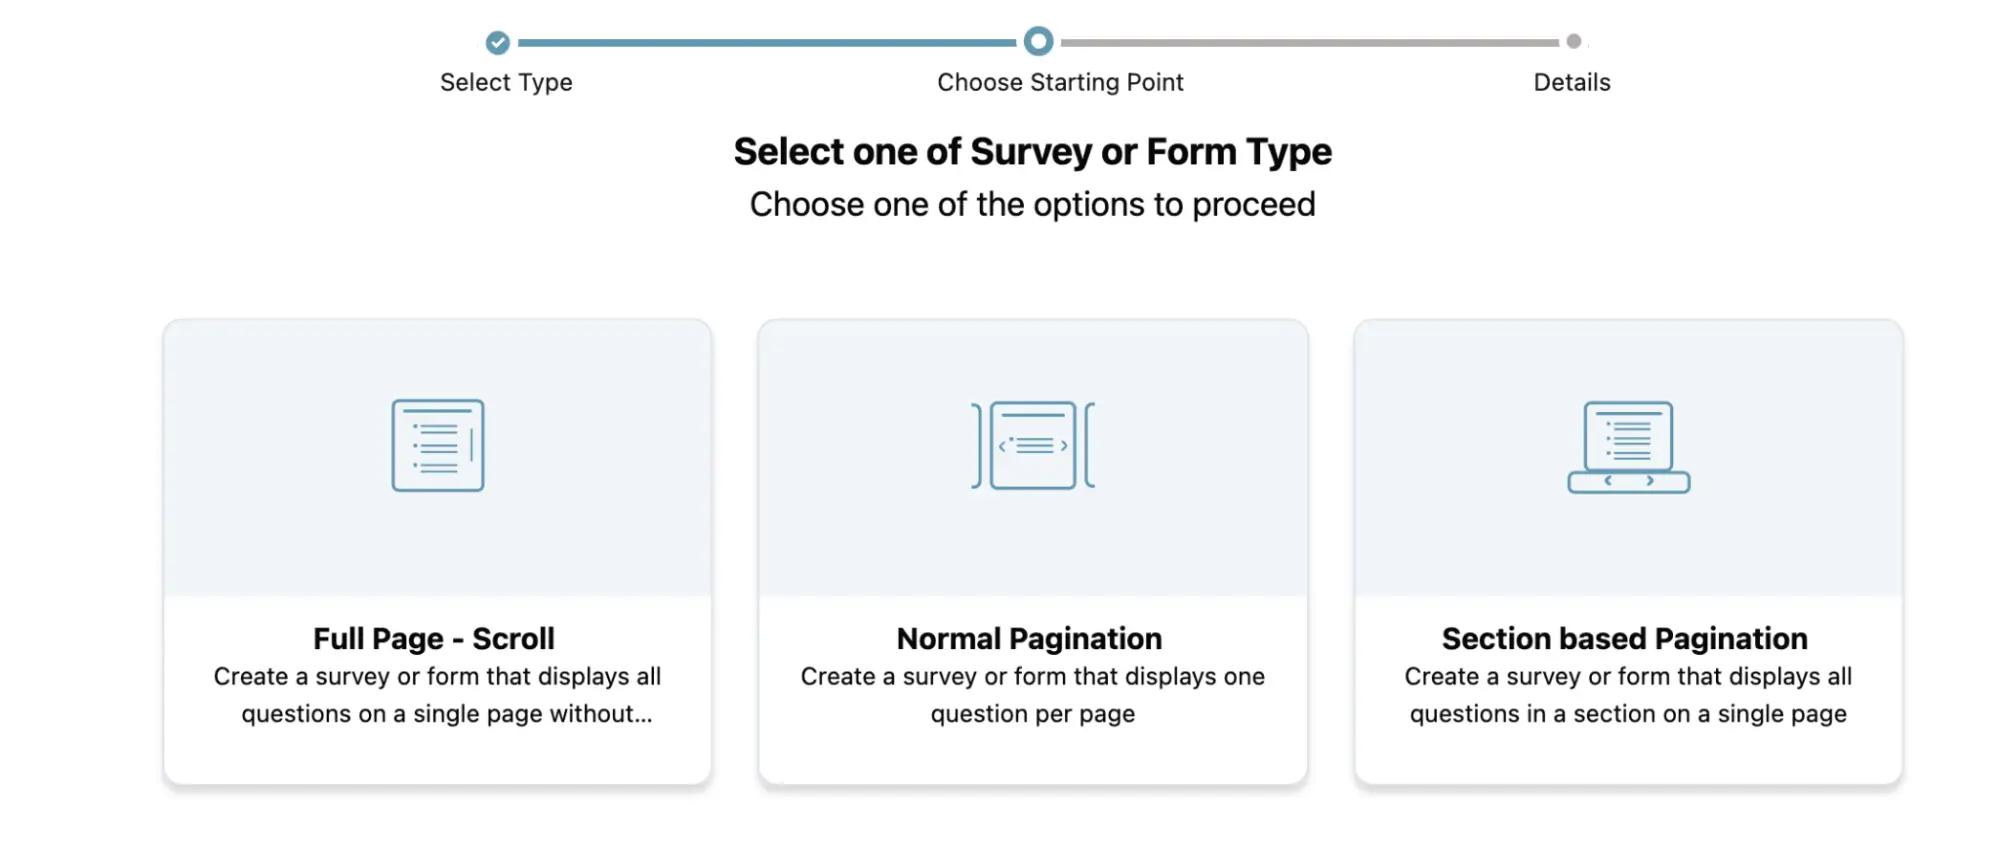
Once you select “Create Form”, you can now select if you want to start a form from scratch or choose from an existing design template.

Then select your form navigation type by selecting one of the options from the next screen.
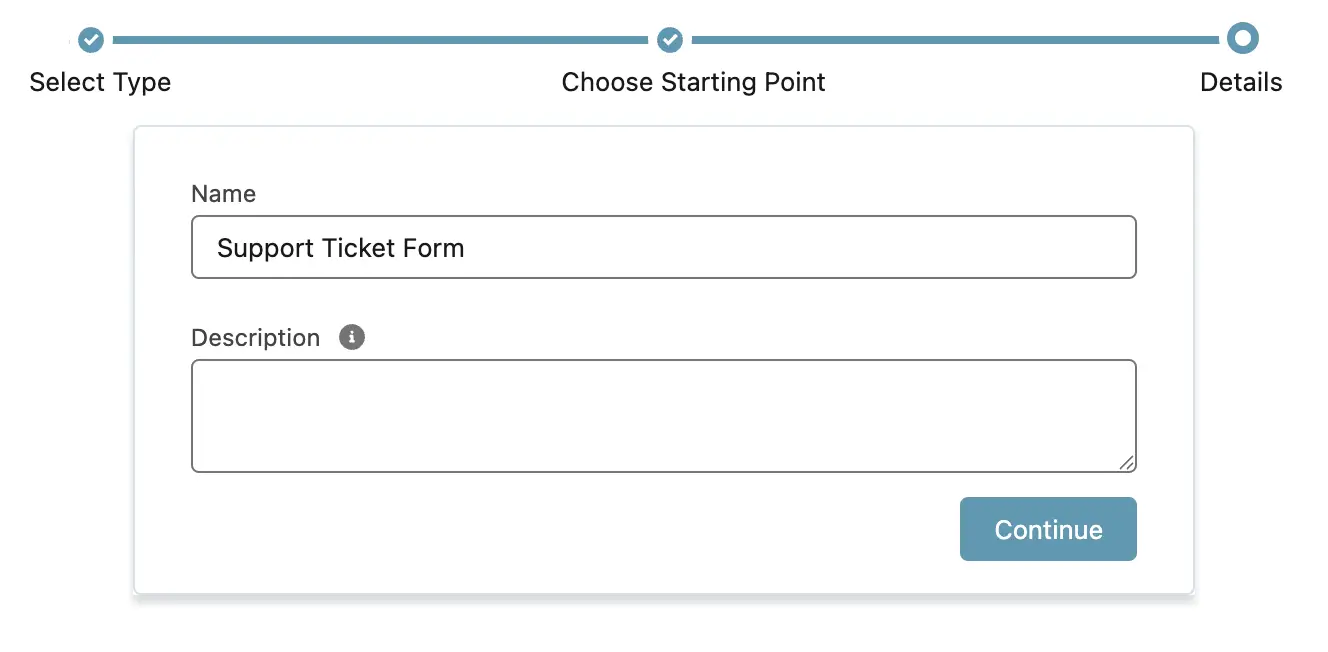
Name your survey Support Ticket Form.
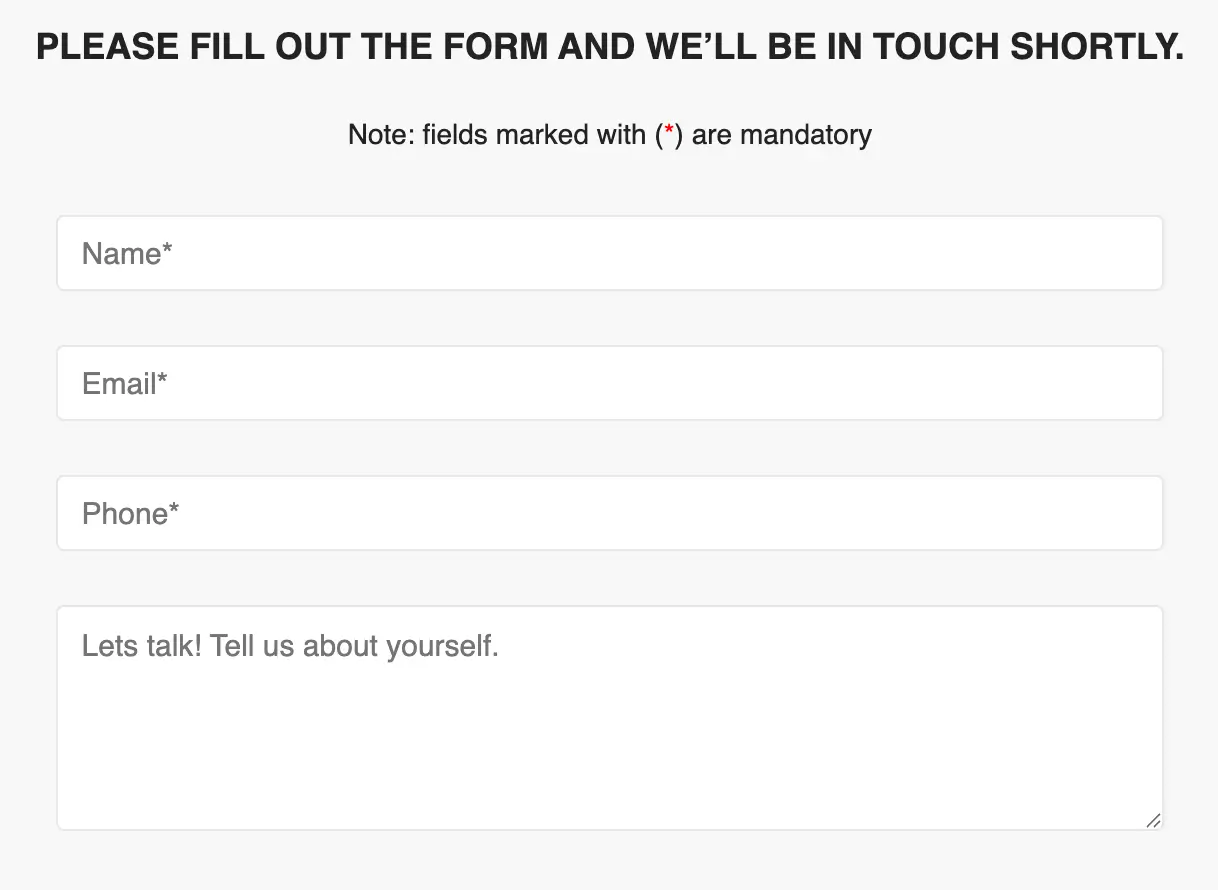
- After naming your form, you will see options to build it by adding form elements, designing its layout, and previewing how it will appear.
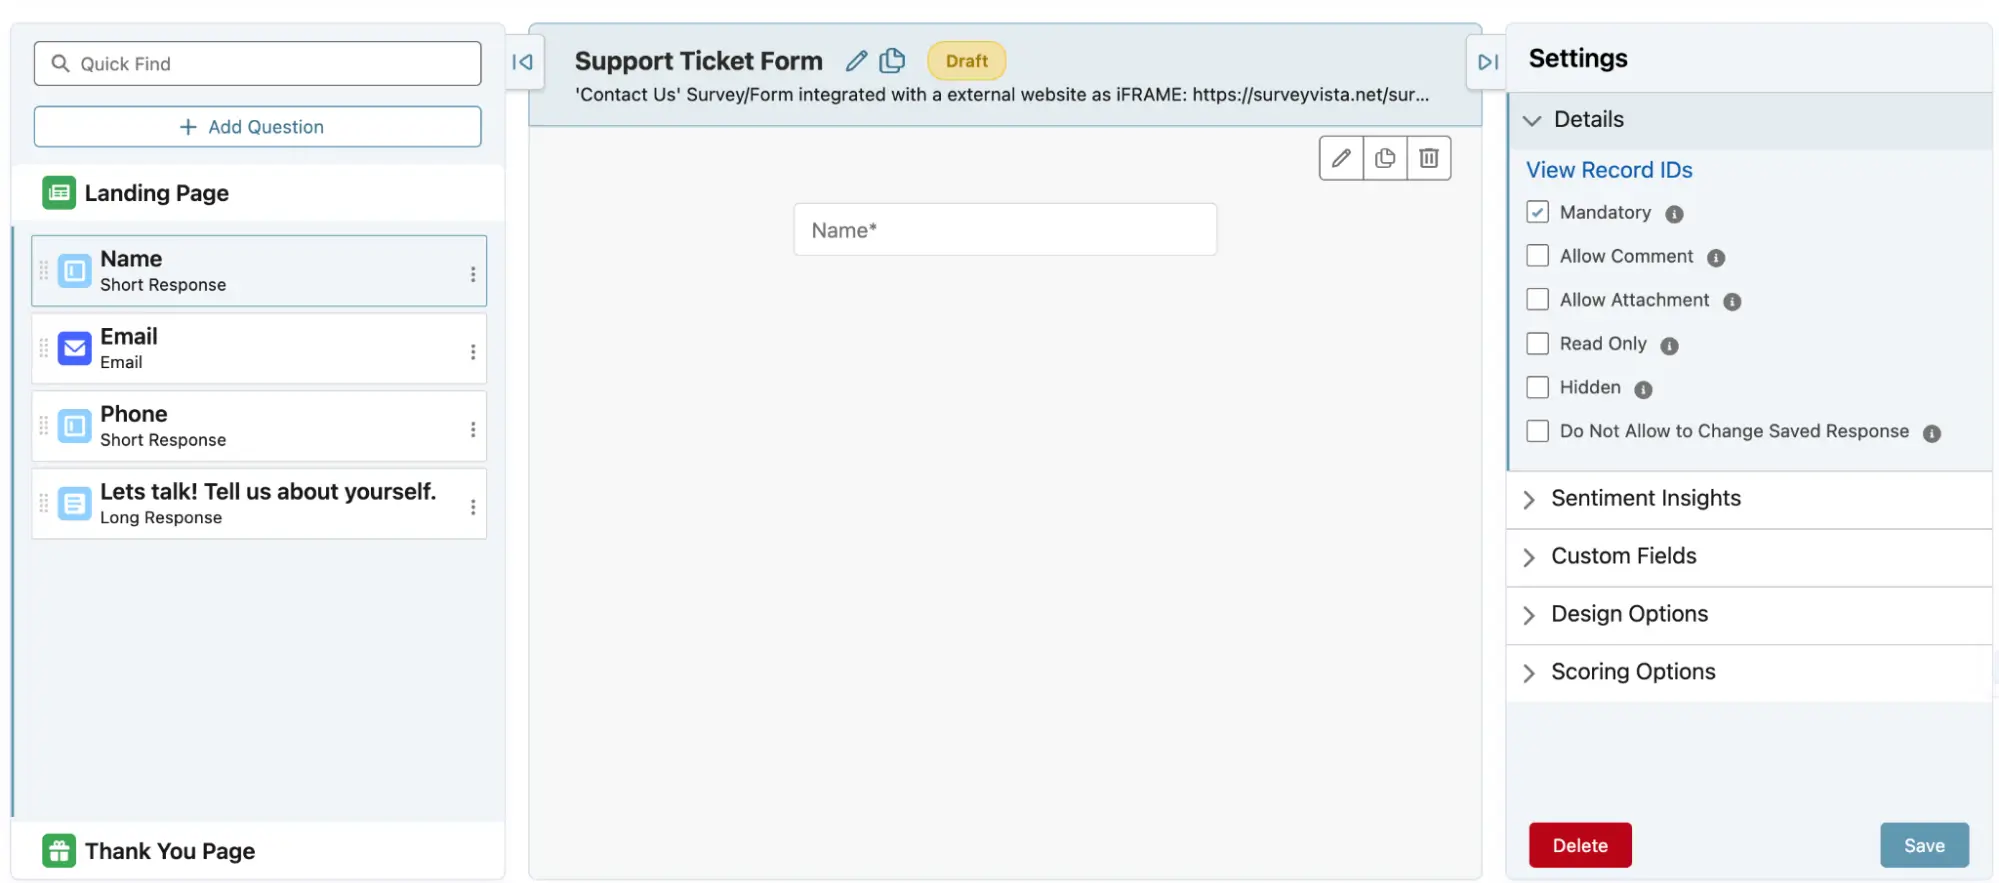 After selecting your form element from the side bar, you can drag the element to your form content.
- Add fields to capture essential details, such as:
- Customer Name
- Contact Information
- Issue Type (Dropdown Selection)
- Description of the Problem
- File Upload (for screenshots or documentation)
- Use conditional logic to dynamically display relevant questions.
After selecting your form element, you can edit it by clicking the ‘pencil’ icon at the top right.
You can now edit the label, adjust the options to suit your requirements, modify the design, add details, and then click ‘Save’.
Add a customized ‘thank you’ message by dragging the ‘Thank you’. You can edit it and add the message.

- Add fields to capture essential details, such as:
- Once you have installed the app, go to ‘Ardira Surveys’ from the menu bar, then click ‘New’ in the top right corner.
-
Design form for branding
- Once you have added all your questions to the Ticket Form, you can proceed to design it. You can customize the background, adjust the header and footer appearance, change the color of the ‘Submit’ button (or if you want to change the button altogether), and more.
- Modify the form landing page (aka welcome page) and footer messages by clicking on ‘Landing Page’ in the Content tab.You can add text, image or link in the footer based on your preferences.

- Go to ‘Settings’ from the menu bar to access advanced options such as Question Dependency, Response Mapping, copying the survey link, and more
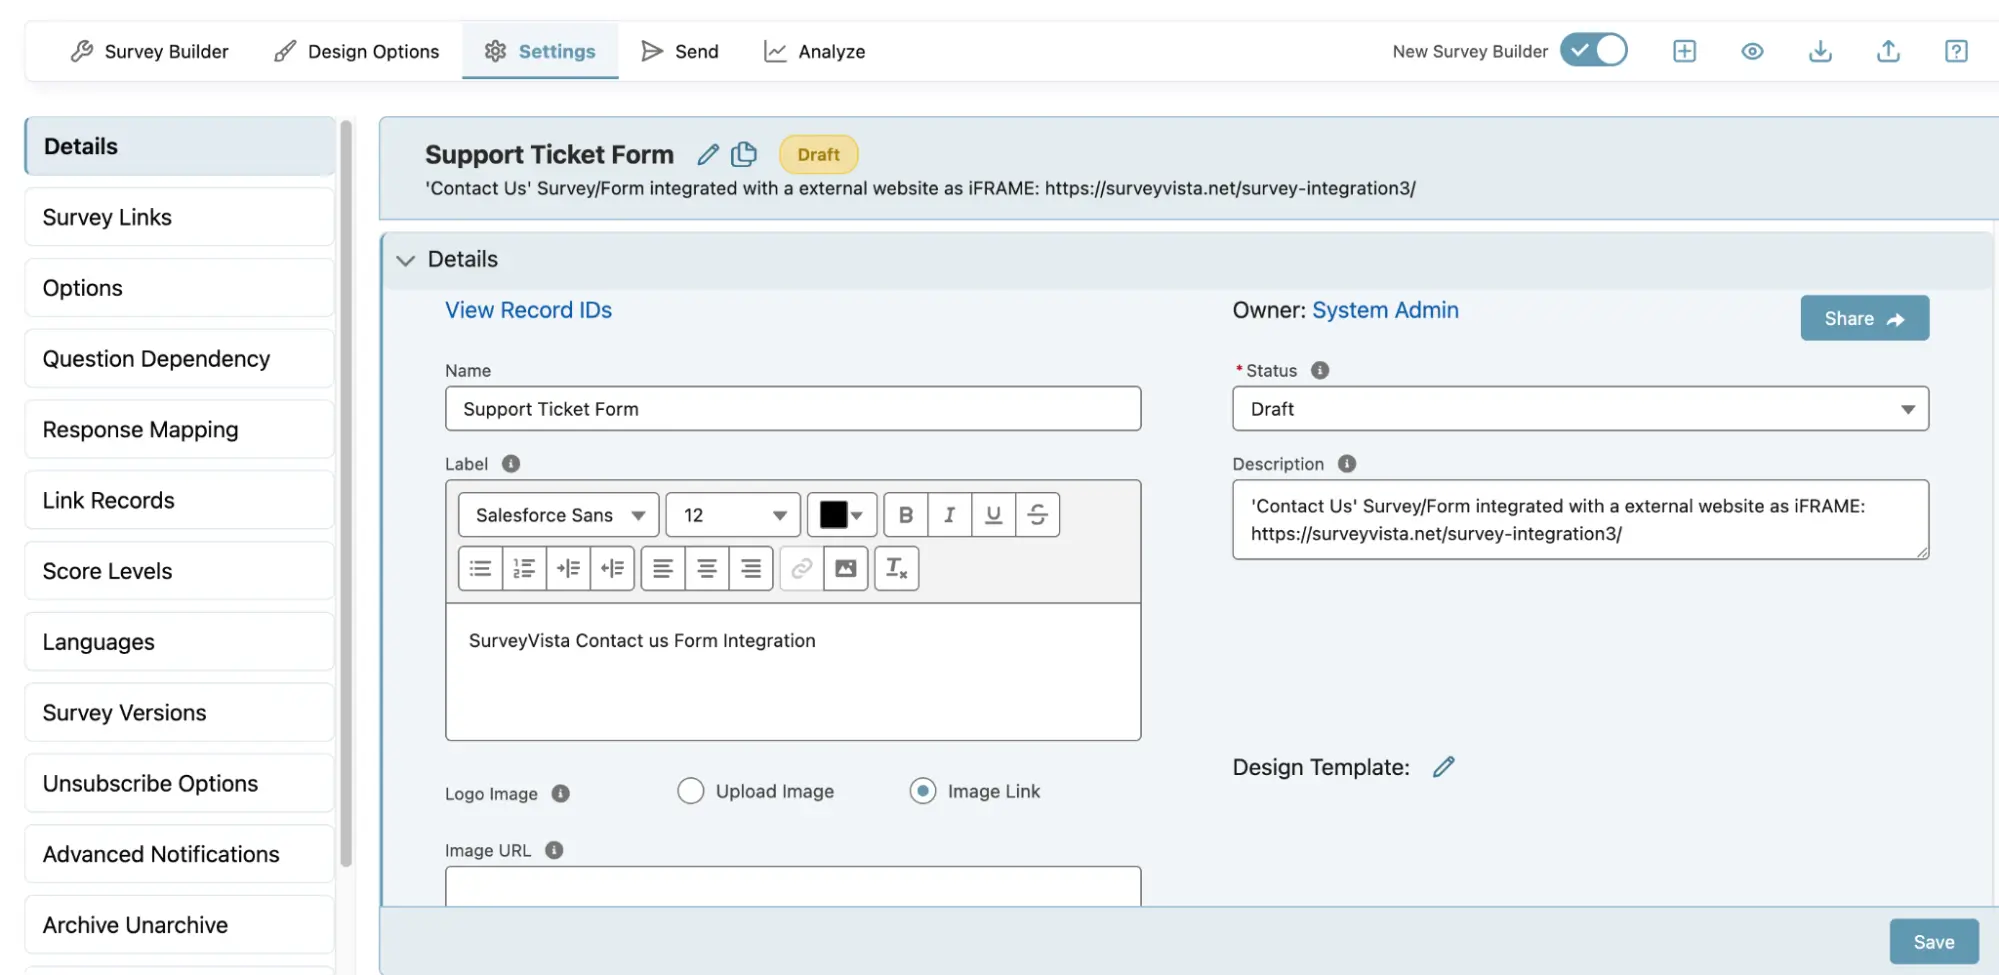 For advanced features, check out the Survey settings
 - Preview on Mobile & Desktop
- Once you have added all your questions to the Ticket Form, you can proceed to design it. You can customize the background, adjust the header and footer appearance, change the color of the ‘Submit’ button (or if you want to change the button altogether), and more.
Step 3: Embed the Form on Your Support Website
- Copy the provided embed link from SurveyVista.
- Insert it into your website’s support page using an iframe or direct link.
- Customize the styling to match your branding.
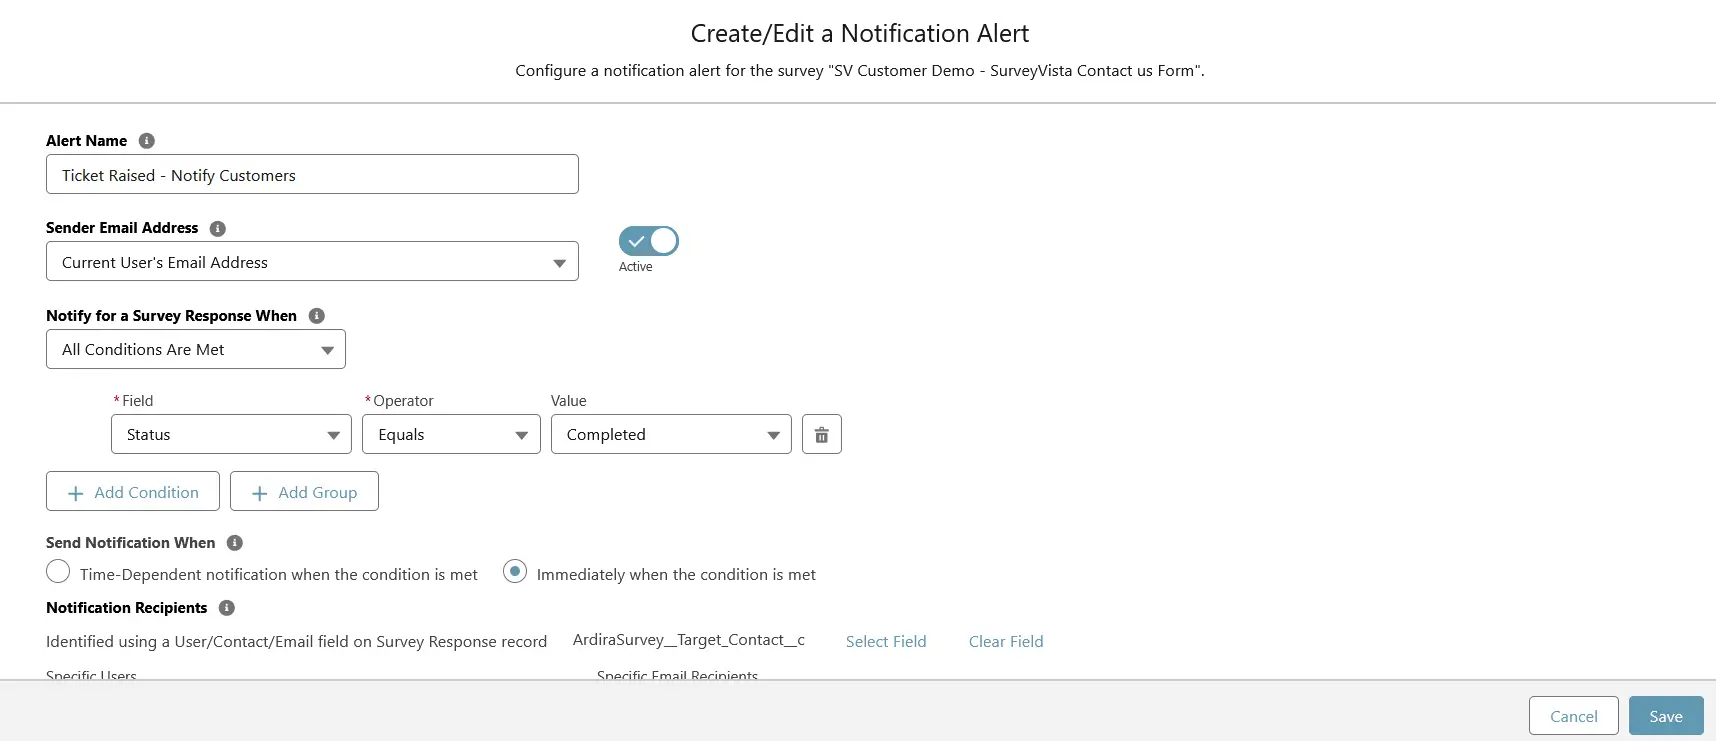
Step 4: Automate Ticket Handling with CRM Workflows
- Use SurveyVista’s response mapping to create a case when a form is submitted.

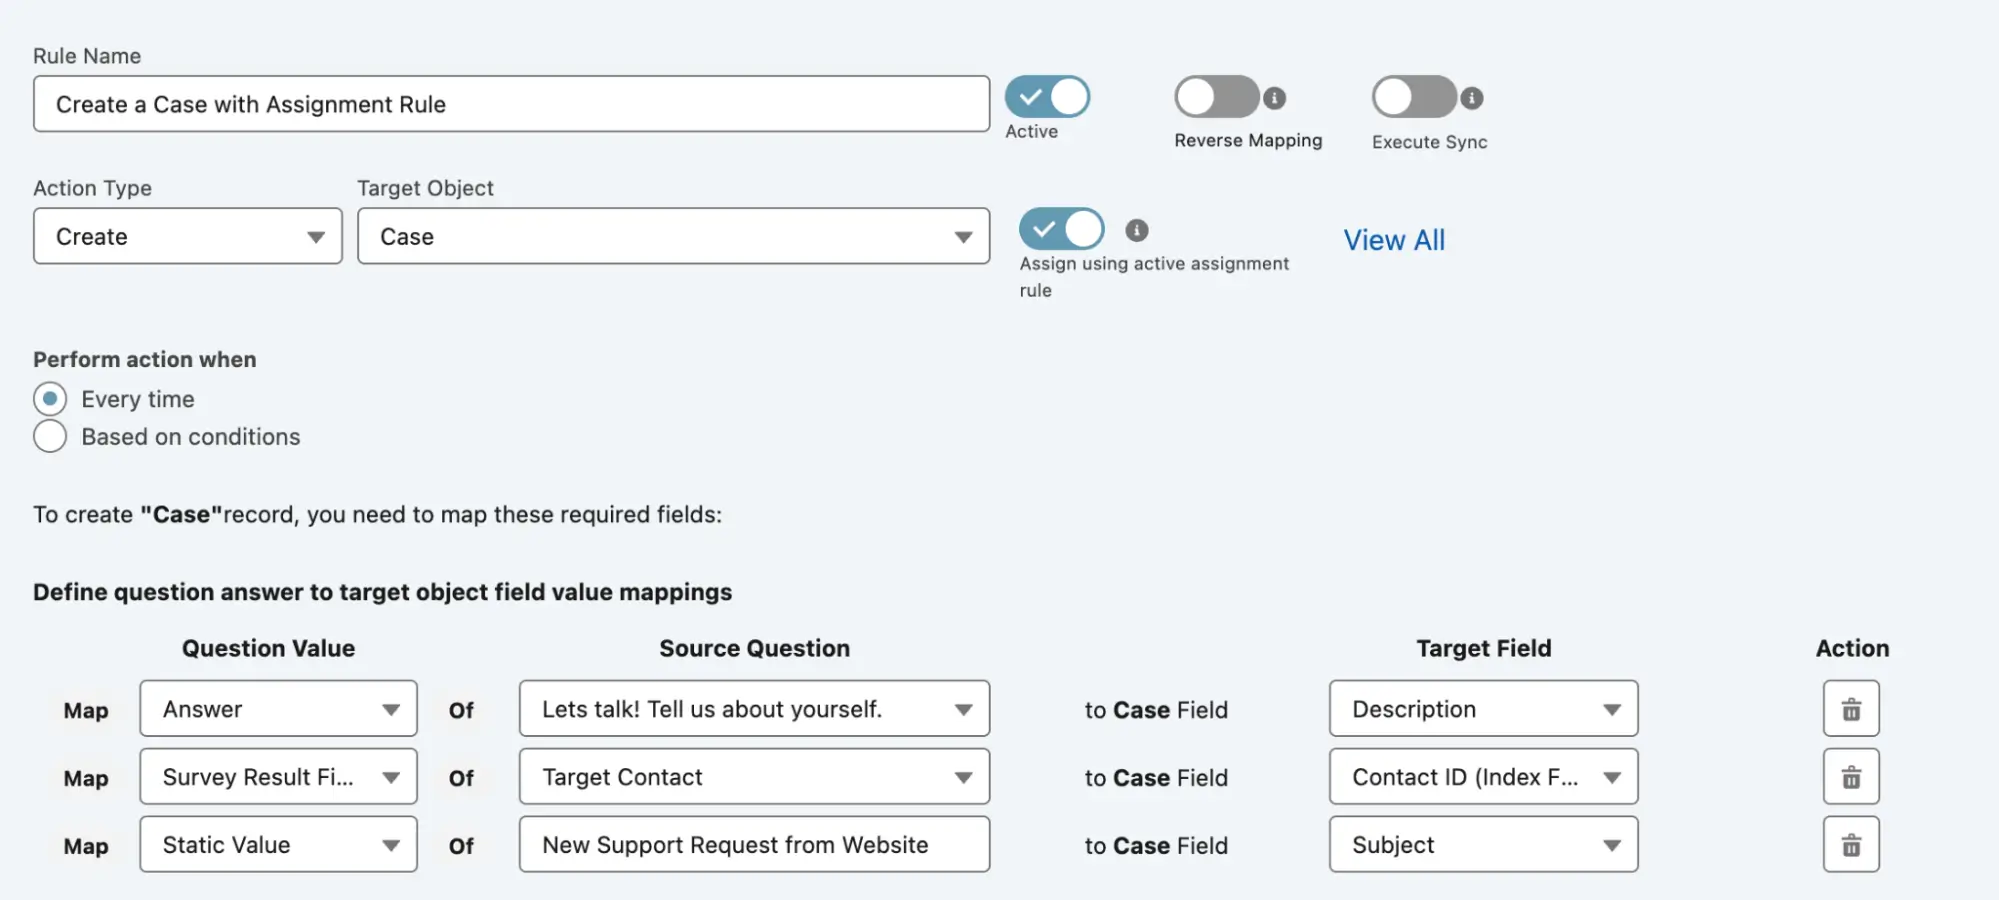
- Assign tickets to the appropriate team based on issue type.
- Set up automated email confirmations to customers with case details.
Step 5: Analyze and Optimize Support Operations
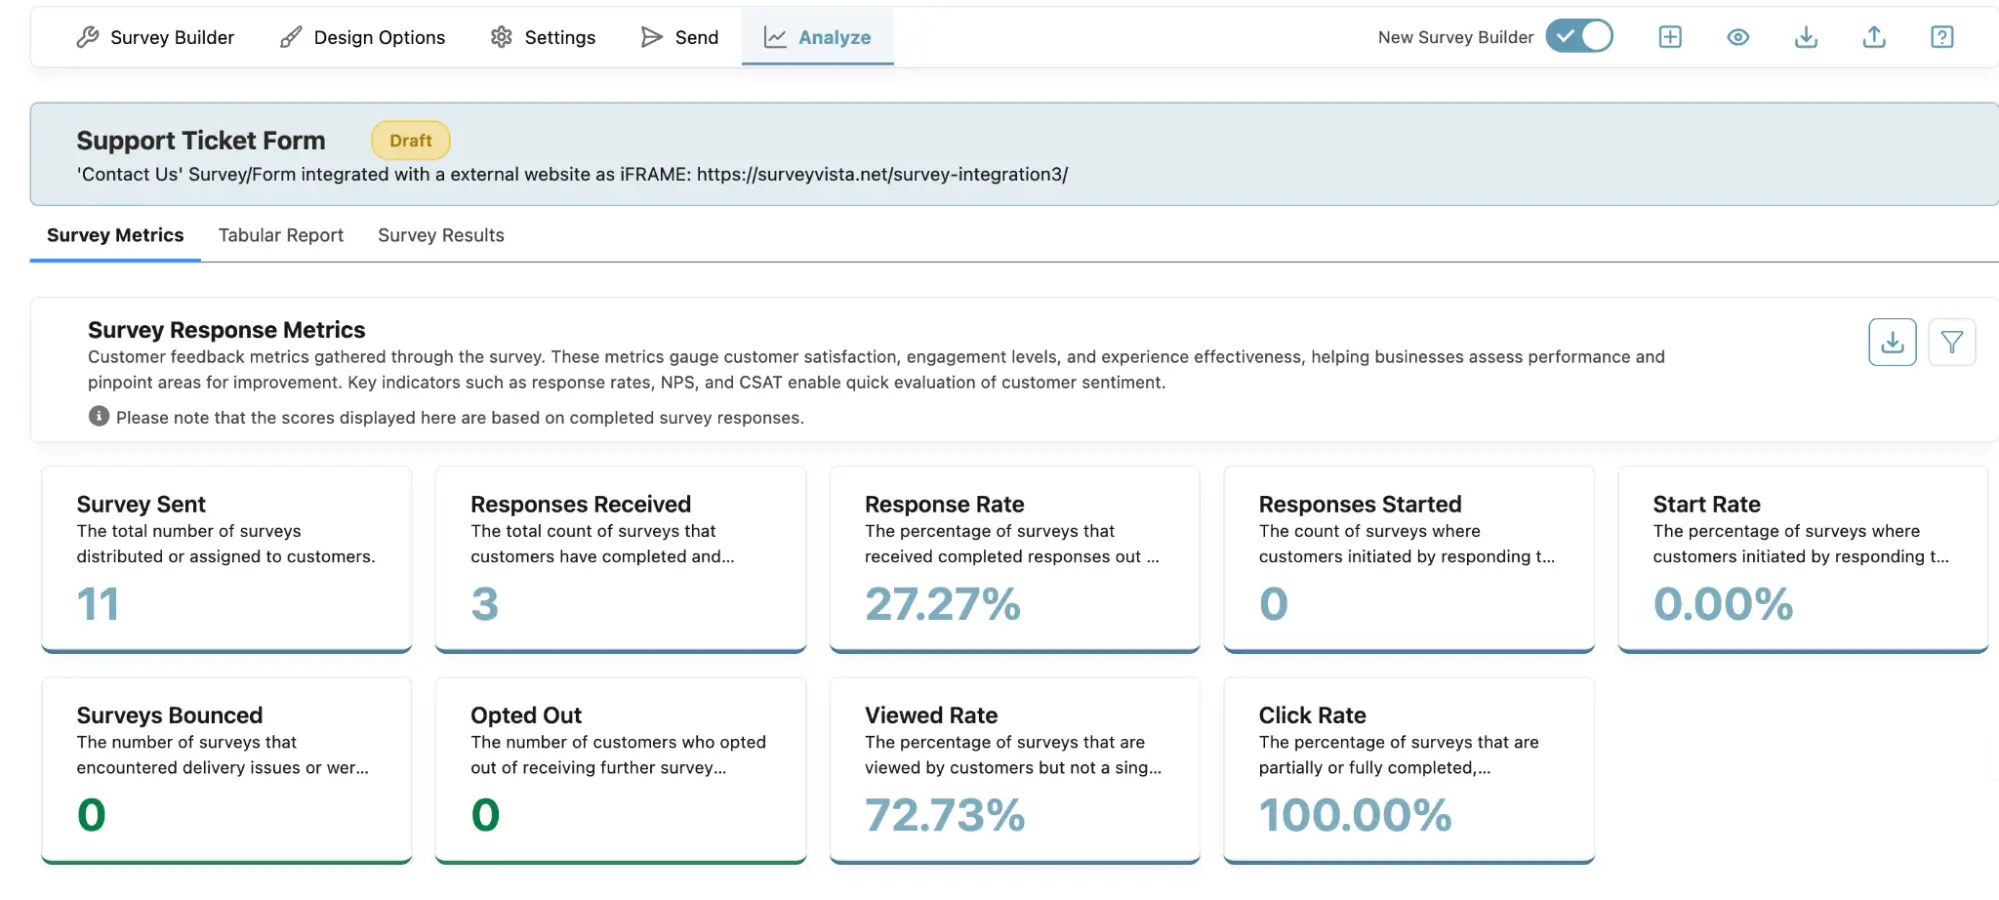
- Track ticket submissions and response times using Survey Metrics dashboards.
- Identify high-impact issues and develop proactive solutions.
Step 6: Continuously Enhance the Ticketing Experience
- Regularly update the Ticket Form based on customer feedback.
- Implement feedback survey follow-ups to measure satisfaction after issue resolution.
- Optimize workflows to minimize response times and maximize efficiency.
About SurveyVista
SurveyVista is a 5-star rated, 100% native Salesforce Survey, Form, and Assessment Solution, revolutionizing how businesses collect, integrate, understand, and act on feedback—all within Salesforce.
Turn Survey & Form Data into Actionable Insights!
Schedule a demo with our solution engineers today!
More Like This


Rajesh Unadkat 
Founder and CEO
Rajesh is the visionary leader at the helm of SurveyVista. With a profound vision for the transformative potential of survey solutions, he founded the company in 2020. Rajesh's unwavering commitment to harnessing the power of data-driven insights has led to SurveyVista's rapid evolution as an industry leader.
Connect with Rajesh on LinkedIn to stay updated on the latest insights into the world of survey solutions for customer and employee experience management.