Introduction
Welcome to the AgentVista installation and configuration guide. As the SurveyVista Copilot for Intelligent Surveys, Forms, and Assessments, AgentVista leverages the power of Agentforce to drive intelligent feedback operations. By combining AI-powered survey generation, sentiment insights, and natural language agent actions, AgentVista enhances the creation, distribution, and analysis of surveys, forms, and assessments, providing seamless lifecycle configuration.
This document provides you with the necessary instructions to effectively install, configure, and begin using AgentVista in your Salesforce org. The steps outlined here will guide you through the process of ensuring your system is set up properly, creating surveys with AI assistance, and configuring agents with SurveyVista Actions for an optimal user experience.
Installation Guidelines
To begin using AgentVista, your Salesforce org must be equipped with the necessary prerequisites and the SurveyVista Managed Package. This section provides detailed steps on how to verify your org’s configuration and install the AgentVista package to unlock its full potential. By following these guidelines, you’ll set up your Salesforce environment to support AI-powered survey creation and intelligent feedback operations.
Prerequisites
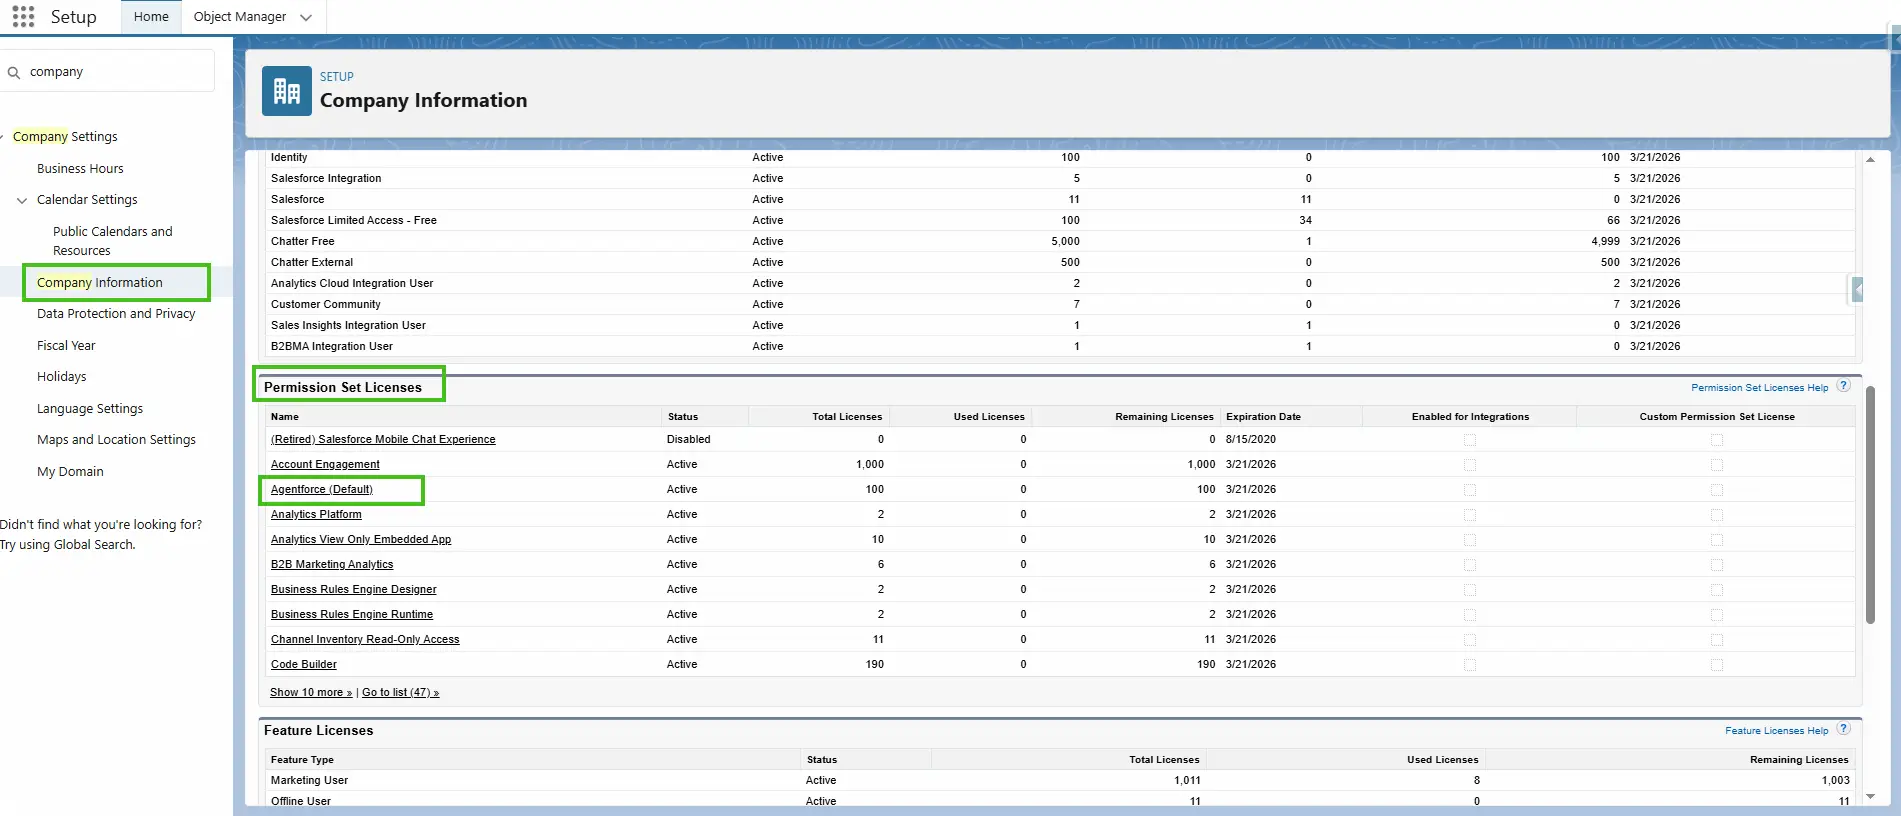
Agentforce Enabled Org
- To use AgentVista, your Salesforce org must be licensed with Agentforce.
- Verify the availability of the Agentforce license by navigating to:
- Setup → Company Information → Permission Set Licenses.
- Ensure the following features are enabled in your org:
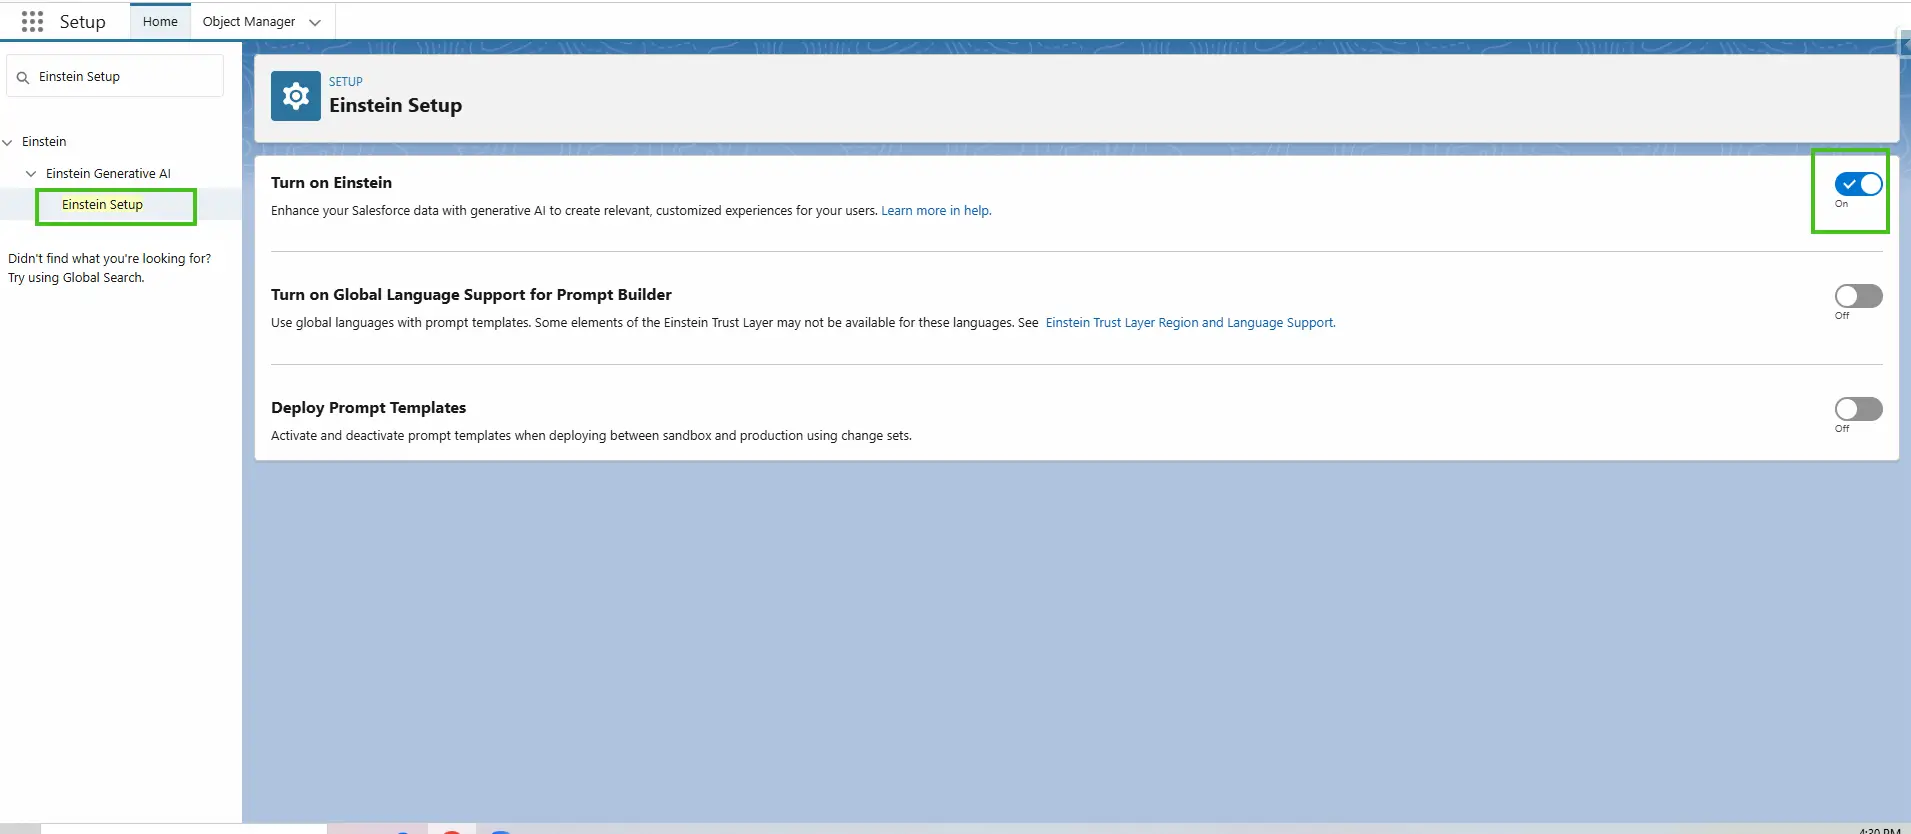
- Einstein Setup
- Go to Salesforce Setup.
- Search for “Generative AI” in the Quick search bar.
- Click on “Einstein Setup,” change “Turn on Einstein” to active.
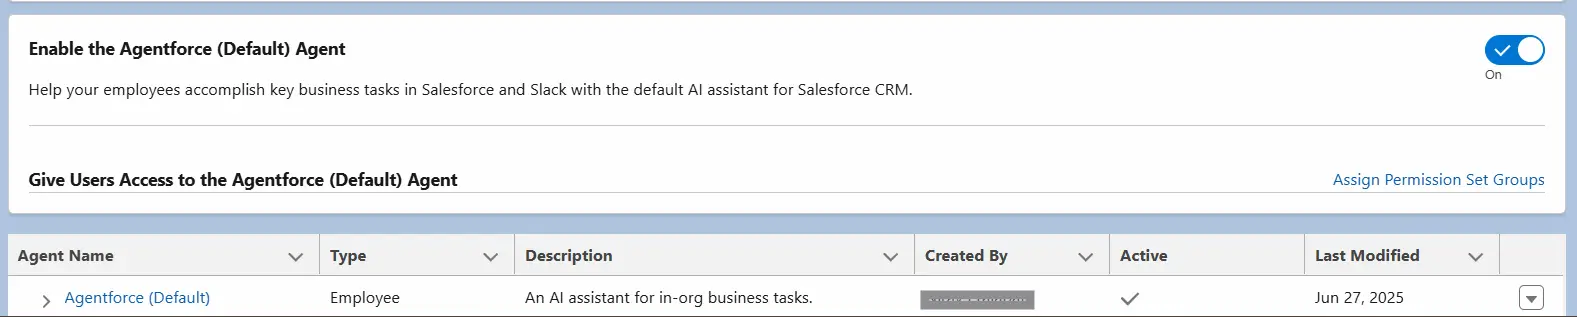
- Agentforce Agents
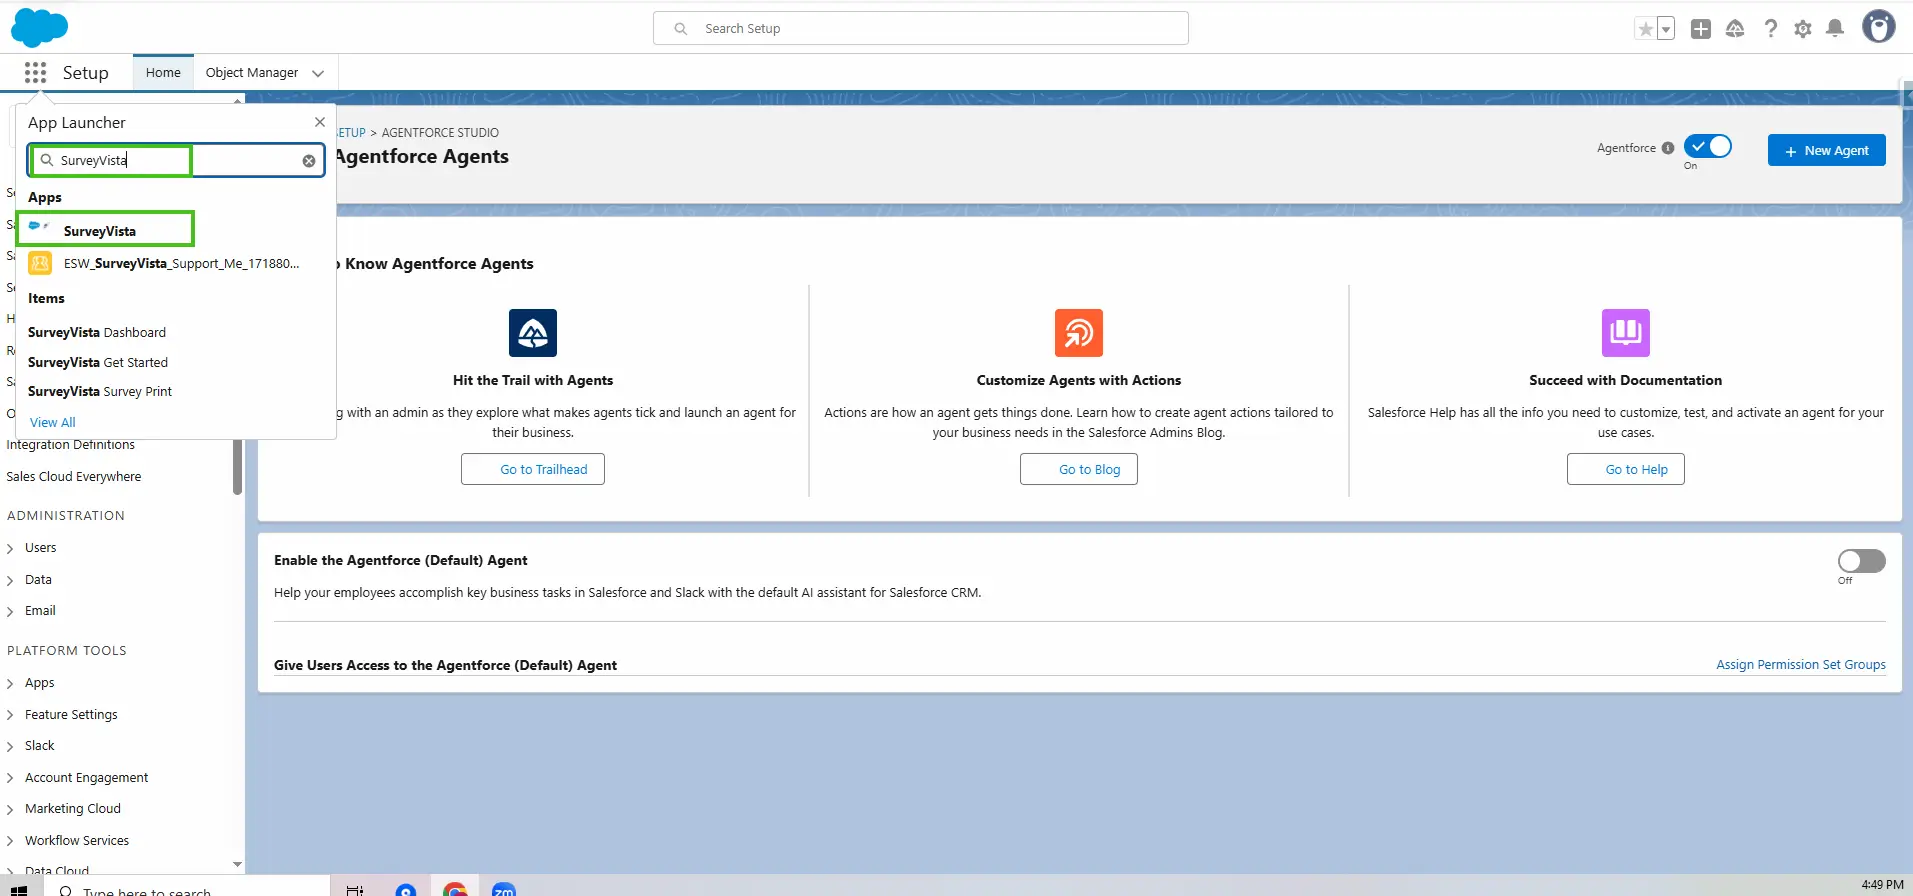
- Search for “Agentforce” in the Quick search bar.
- Click on “Agentforce Agents,” change “Agentforce” to active.
- Change “Enable the Agentforce (Default) Agent” to active.
- If the default agent is not available, you can create a new SurveyVista Agent using the instructions in the Creating a SurveyVista Agent – Employee Type document.

- Einstein Setup
- Refresh page.
- You will see the default agent at the bottom in Agentforce Agent.
SurveyVista Managed Package
- Your org must have the SurveyVista Managed Package installed with a minimum version of 2.900.y.
Install AgentVista
- Once your org is configured with all the prerequisites, you can install the AgentVista package from
Installation URL: https://login.salesforce.com/packagingSetupUI/ipLanding.app?apvId=04tPK000006A7O9YAK
Note: To install release on sandbox org, please replace login.salesforce.com with test.salesforce.com in above link.
- Make sure to select “Install for Admins only”.

Configure User Access for AgentVista
- After installing the AgentVista package, assign the appropriate permission set to the user. The user must be granted either:
- “Ardira Survey Admin” or “Ardira Survey Author” permission set from the available SurveyVista permissions.
- These permission sets are part of the SurveyVista managed package.
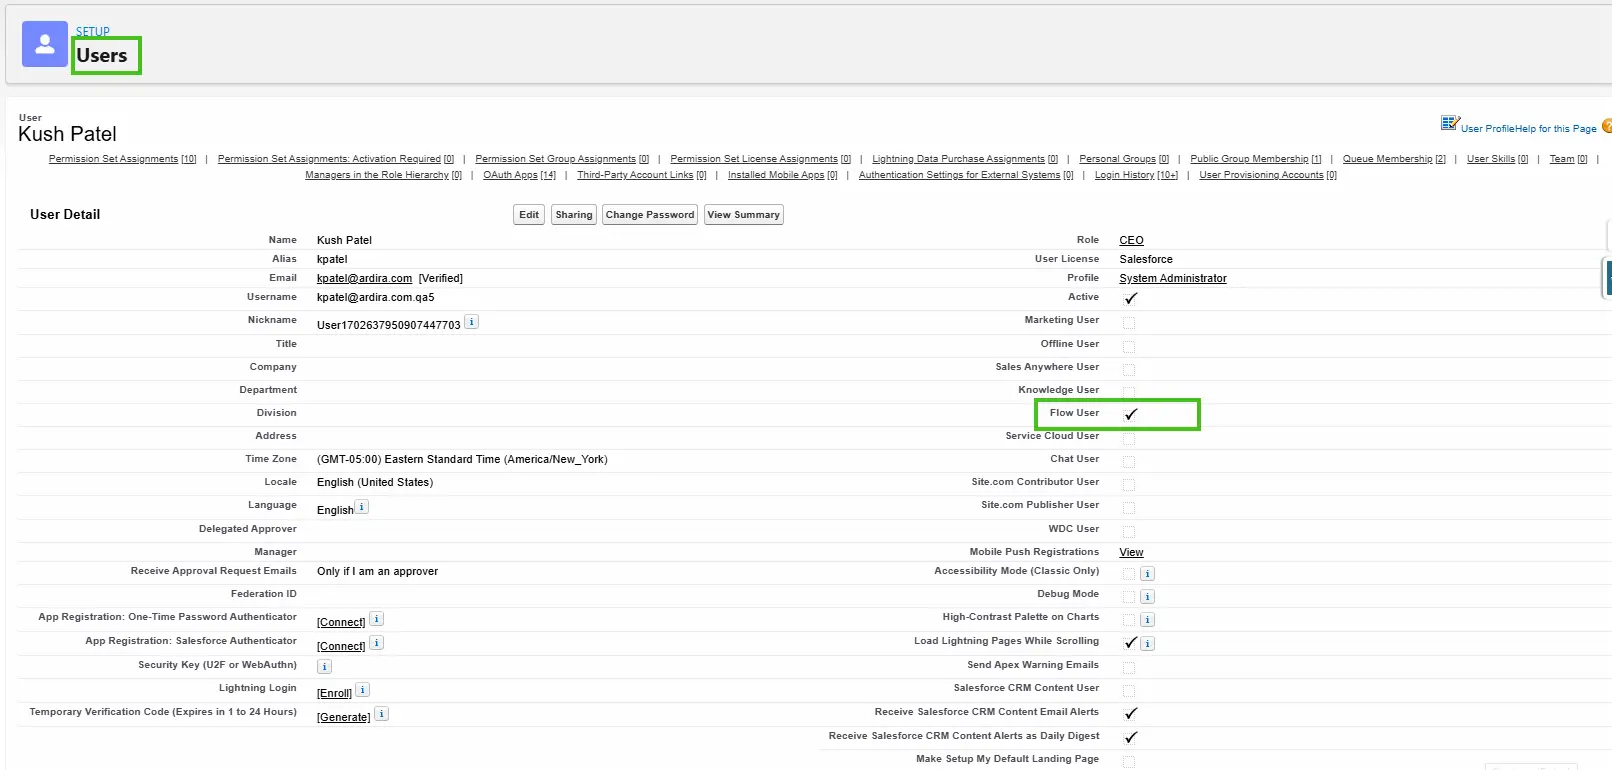
- If your user is not a System Admin, enable the Flow User permission from the user record.
Create Survey with AI
AgentVista brings the power of AI to the survey creation process, allowing you to easily generate surveys using pre-configured custom prompts. This section guides you through the simple steps to create surveys using AgentVista’s AI capabilities. Whether you are gathering feedback on products, services, or customer experiences, AI-driven survey generation ensures you receive actionable insights tailored to your business needs.
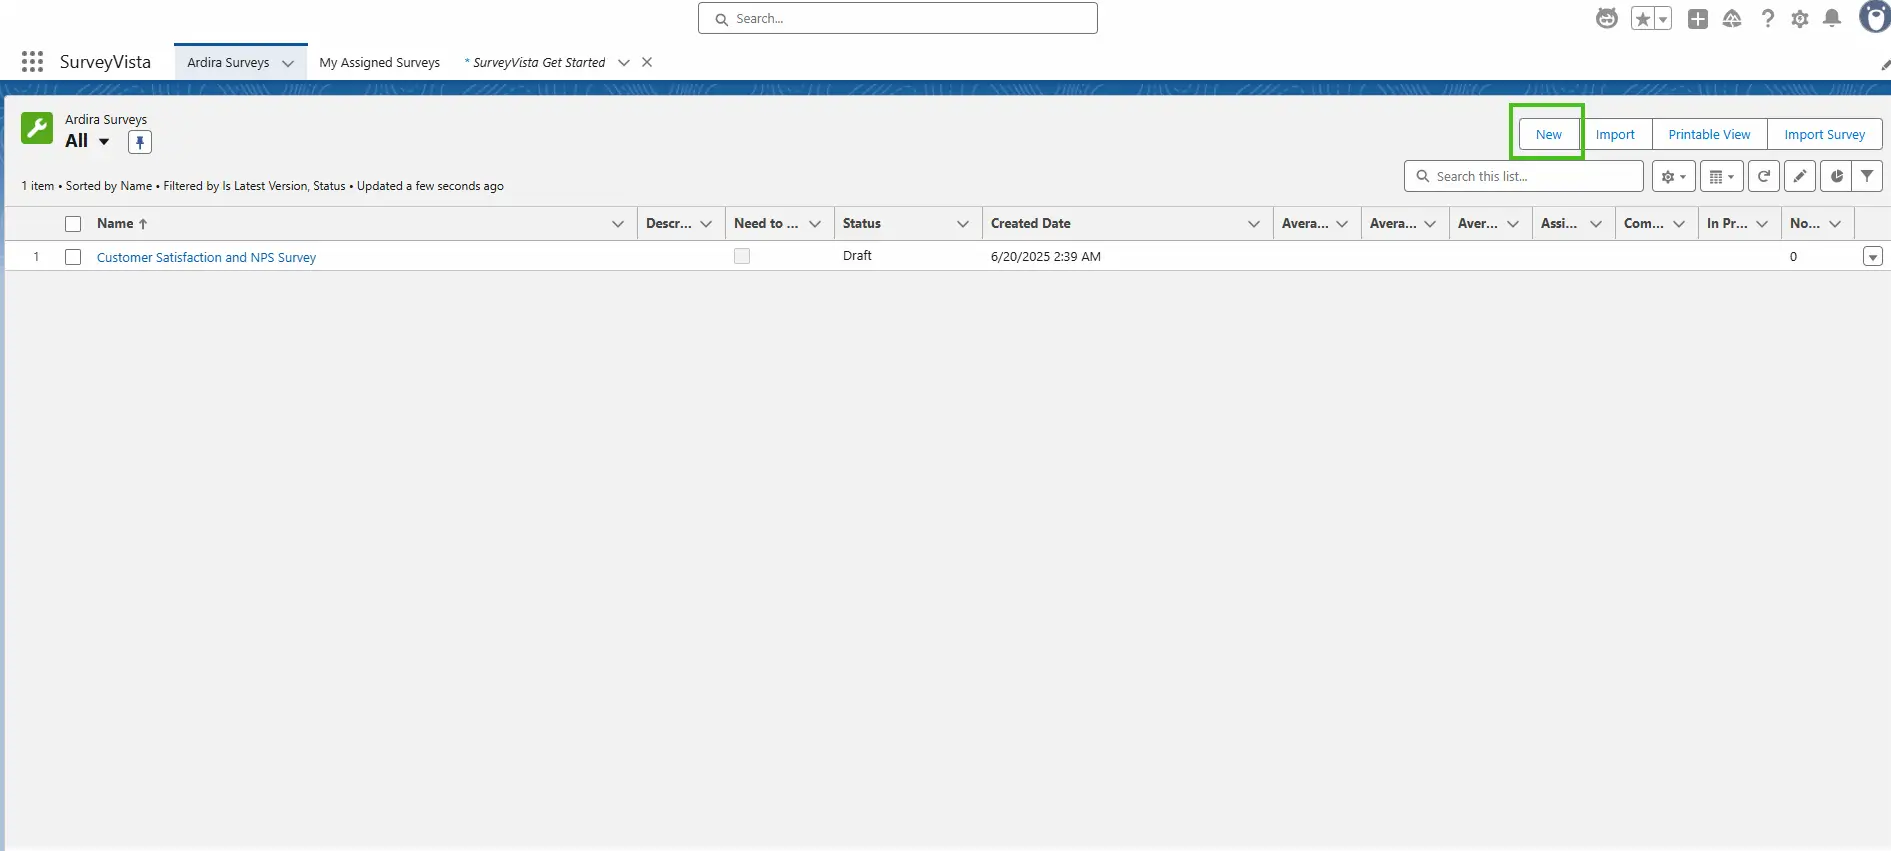
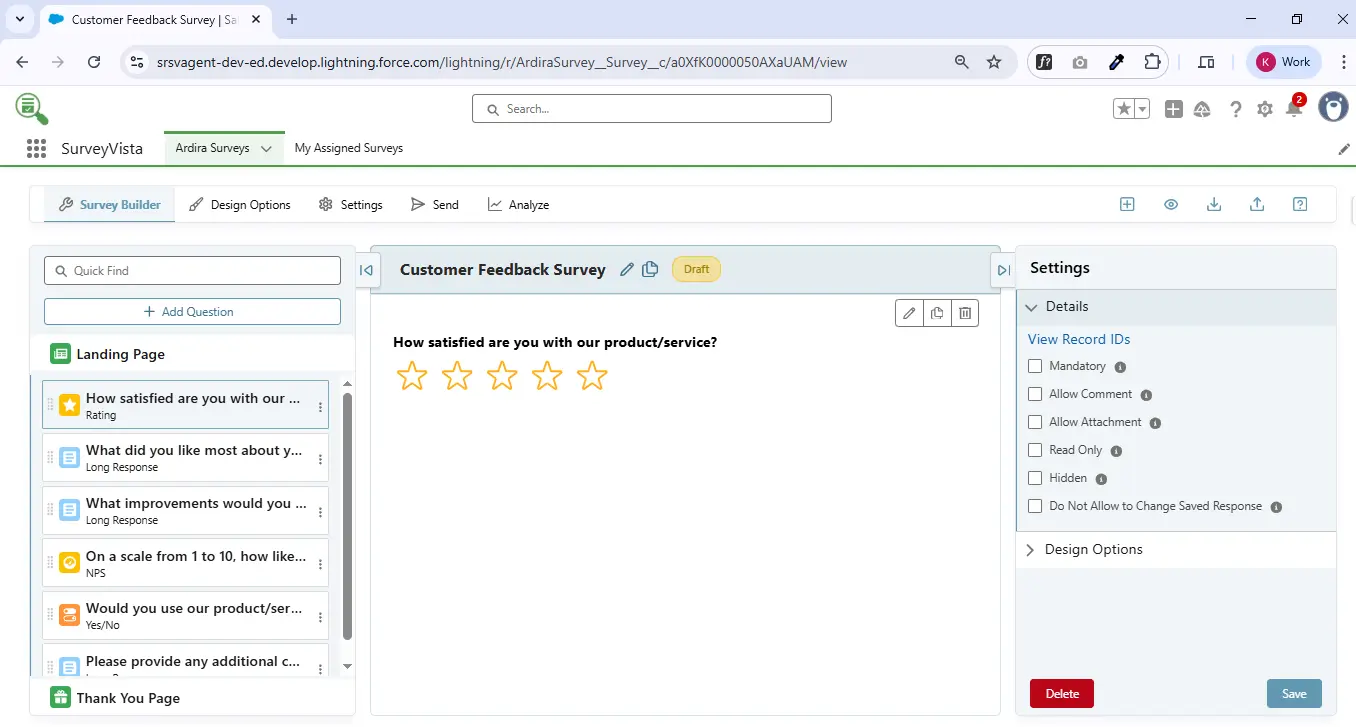
- Open your Salesforce org and search for “SurveyVista” in the App Launcher.
- Click New to create a new survey using AI.
- Select the Create with AI tile.
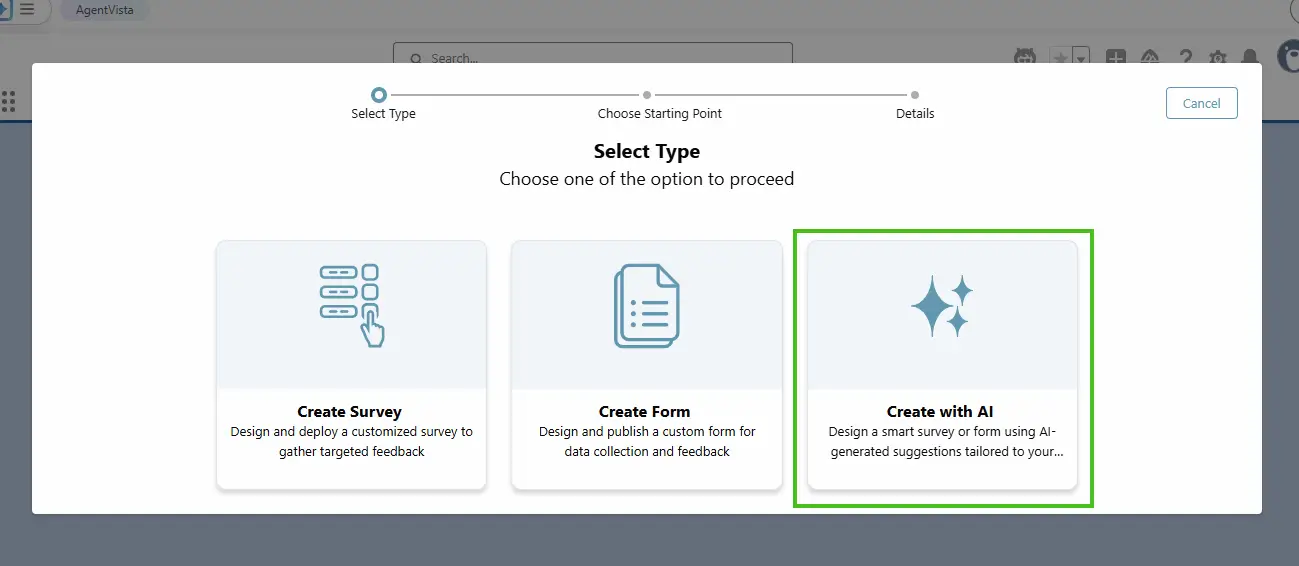
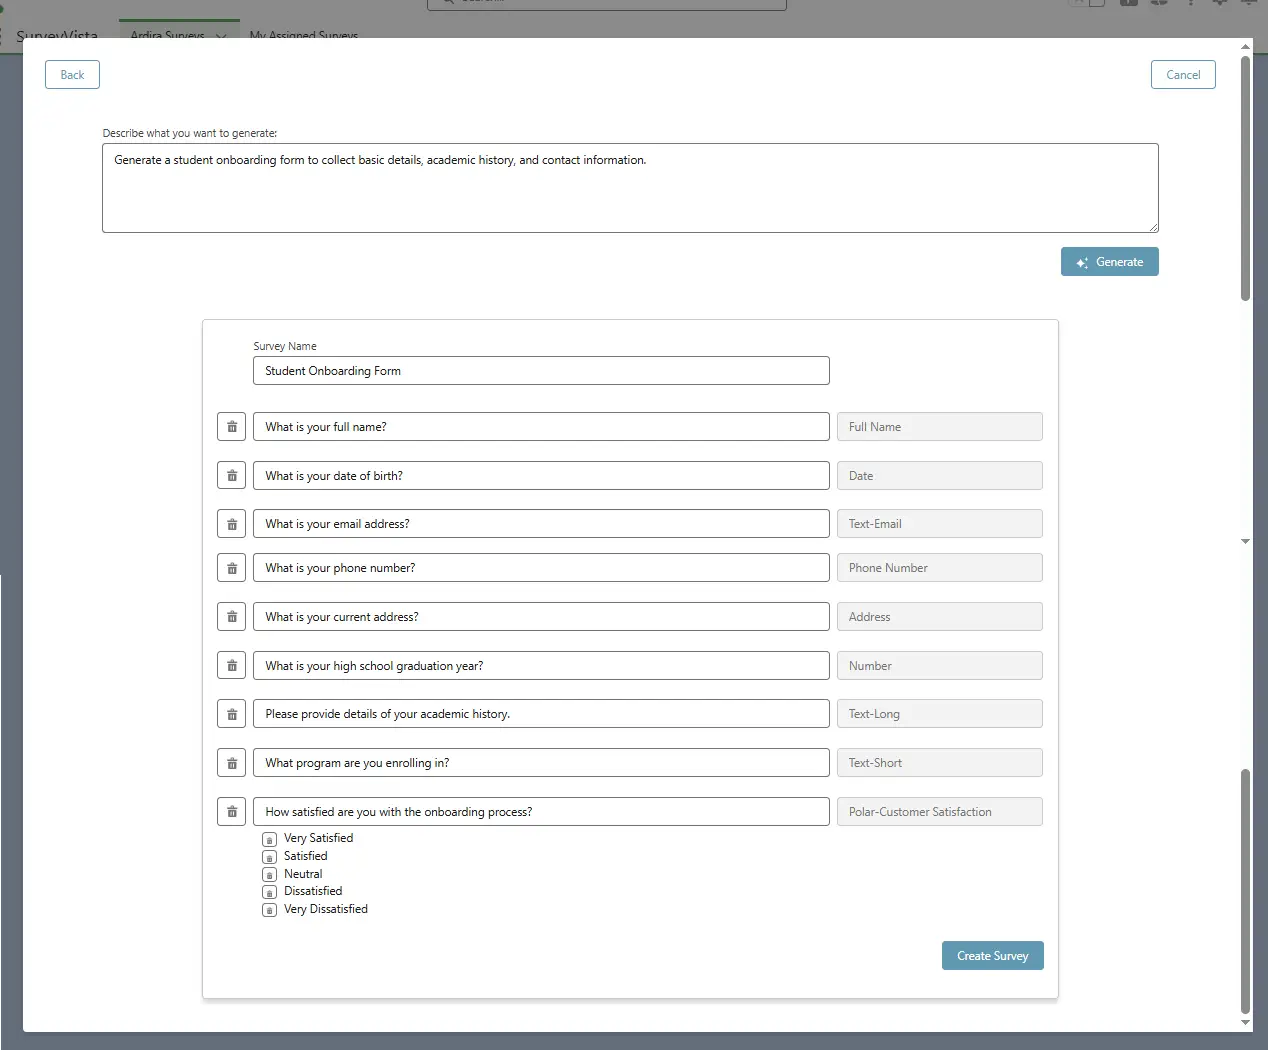
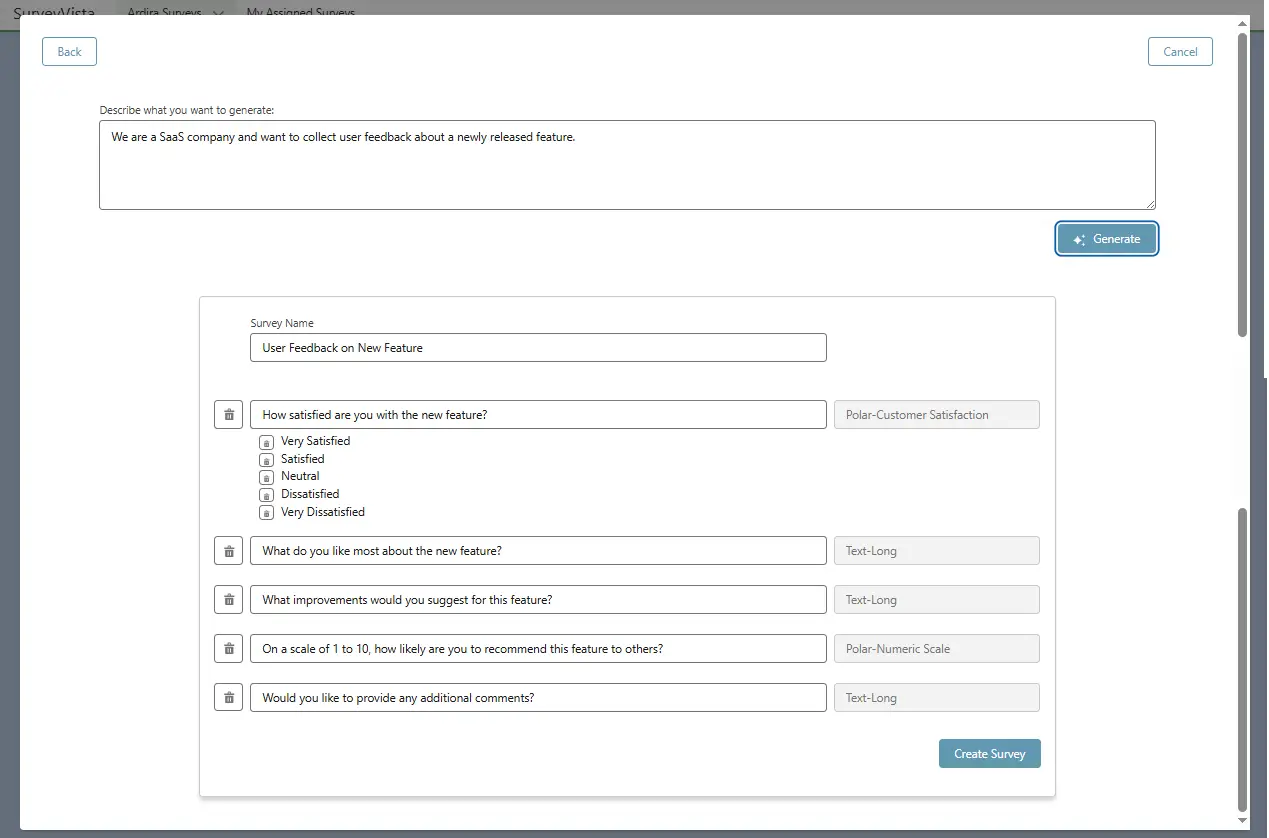
- Choose a default prompt or enter your custom prompt to generate the survey.
Note: You can find more sample prompt examples below for your reference.

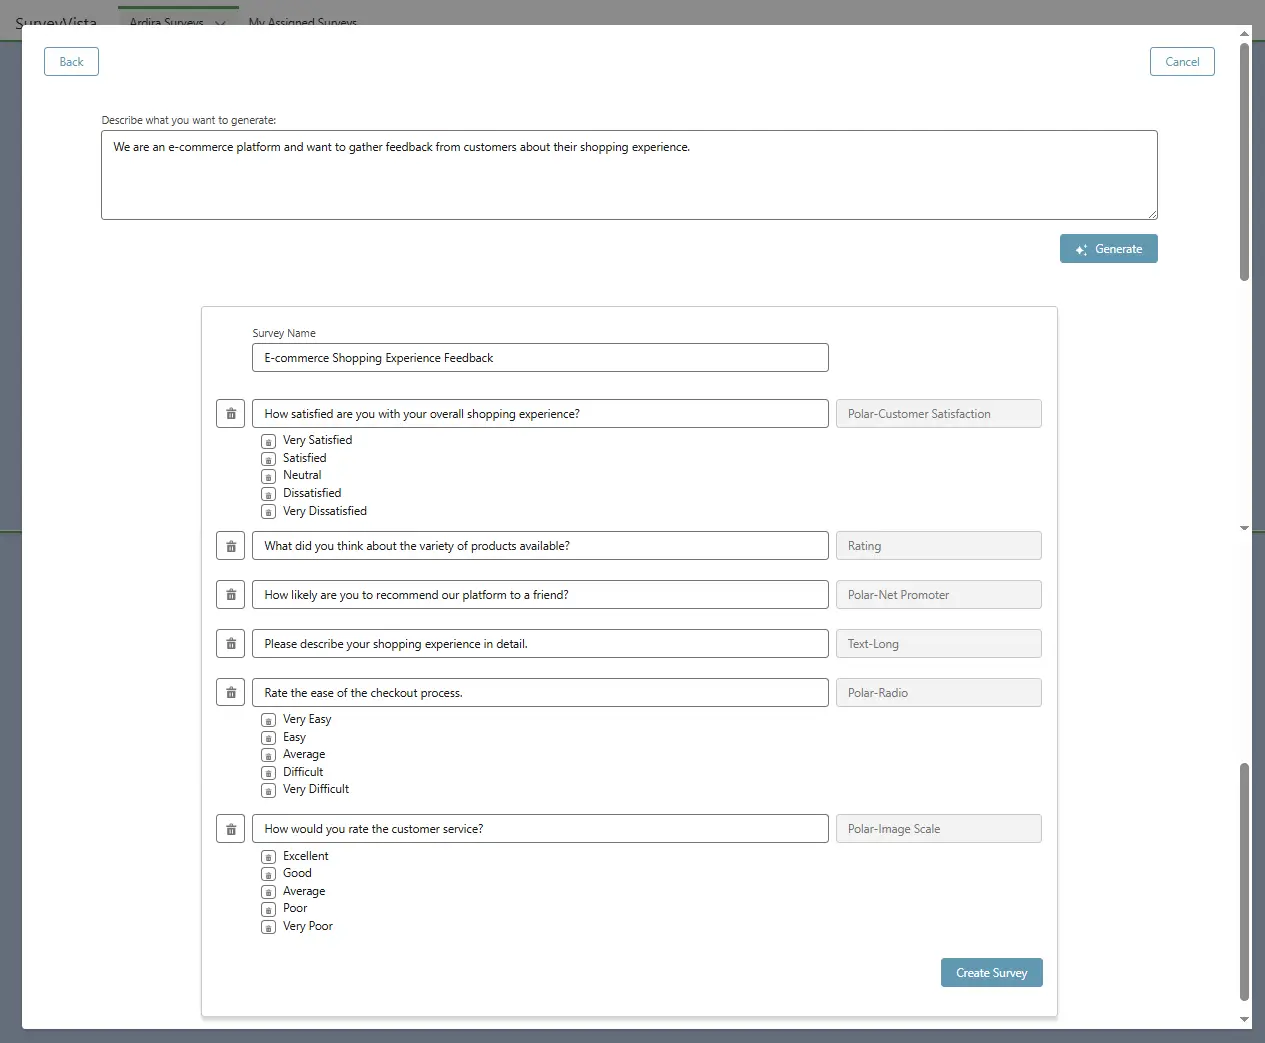
- Click Generate to allow AI to create the survey.

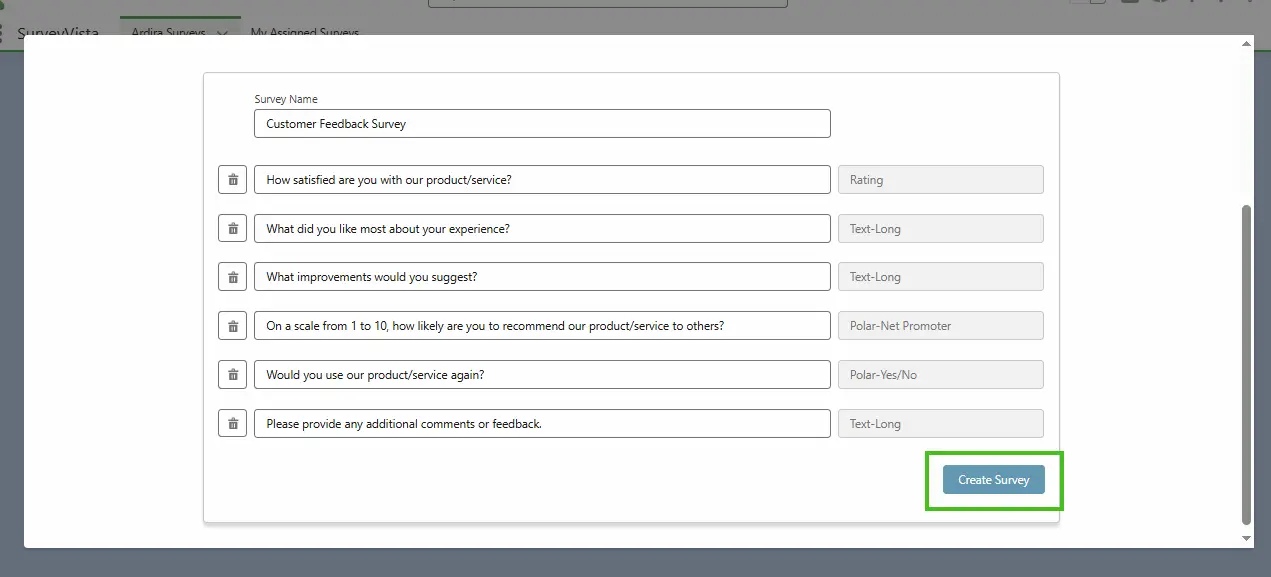
- Review and edit the AI-generated survey, including questions and answer choices.
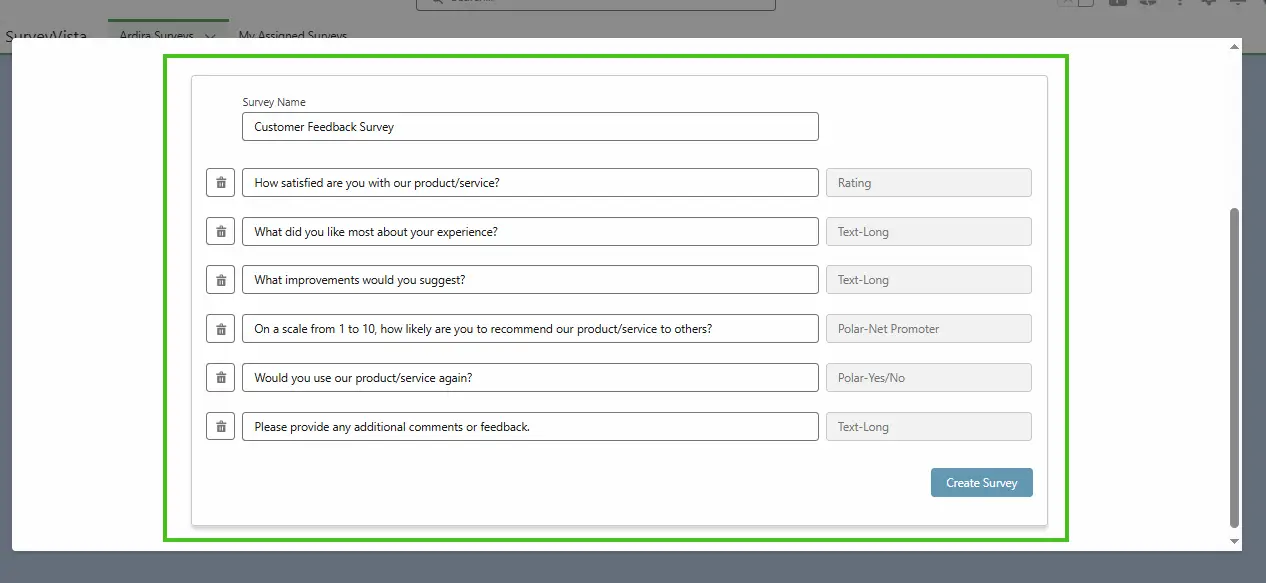
- Once satisfied, click Create Survey to save your new SurveyVista survey.
Sample Prompt Example
- Generate a student onboarding form to collect basic details, academic history, and contact information.
- We are an e-commerce platform and want to gather feedback from customers about their shopping experience.
- We are a SaaS company and want to collect user feedback about a newly released feature.
Configure the Agent with SurveyVista Actions
Once the installation is complete, configuring agents with SurveyVista Actions is a critical step to enable seamless integration between AgentVista and your Salesforce environment. This section explains how to assign the appropriate permission sets and configure user access to ensure that agents can effectively use SurveyVista’s features, including survey distribution, sentiment analysis, and lifecycle management. With these configurations, agents can perform natural language actions to streamline survey distribution and gain deep insights from feedback.
- Go to Salesforce Setup.
- Search for “AgentVista Agent” in the Quick Search bar and select it.
- At the bottom of the page, under Agentforce Agent, you’ll see the default agent. Click on the default agent. (Note: The agent type will be “Employee”).
- If the default agent is not available, you can create a new SurveyVista Agent using the instructions in the Creating a SurveyVista Agent – Employee Type document.
- Click on the “Open in Builder” button located in the top right corner.

- This would open Agentforce Agent Builder.
Configure Agentforce Agent with Topics of SurveyVista
- Click on “Topics” in the left-side panel.
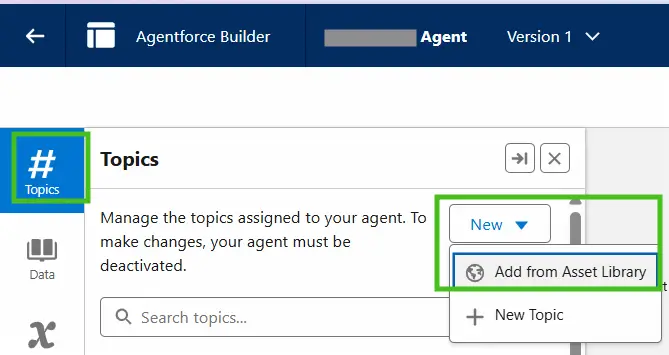
- Click New, then select the “Add from Asset Library” action.
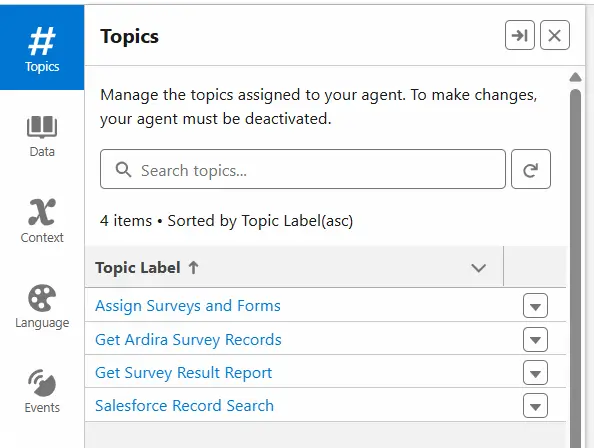
- Search for the following topics and check the boxes to select them:
- Assign Surveys and Forms
- Get Ardira Survey Records
- Get Survey Result Report
- Salesforce Record Search
Note: Do not click on Topic Title or you will lose the current UI.
- Click the “Finish” button to complete the process.
- Click on the refresh icon first to ensure the latest changes are reflected.
- After refreshing, click the “Activate” button to proceed.

Test Agentforce Agent
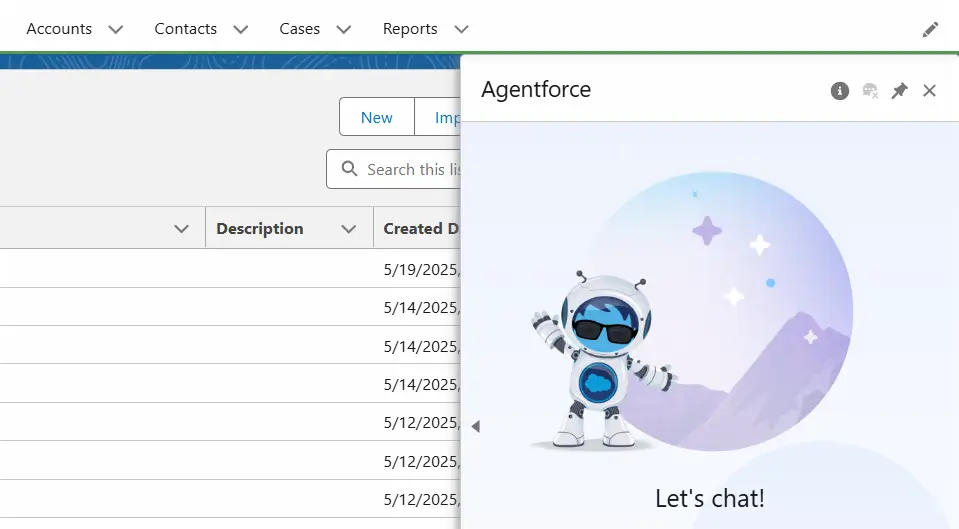
- Click on the Agentforce Agent icon located at the top right of the main menu.

- This will open the Agentforce Agent prompt window, which will appear as a panel on the right side of the screen.
Agentforce Agent use cases for SurveyVista
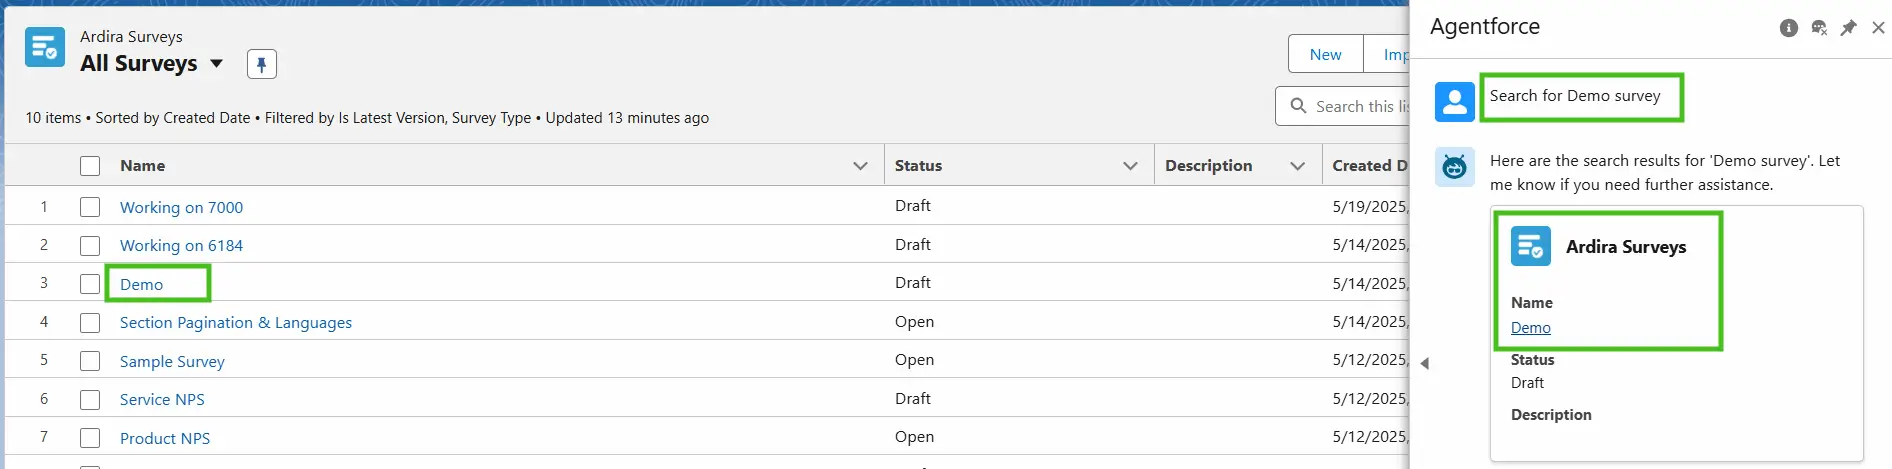
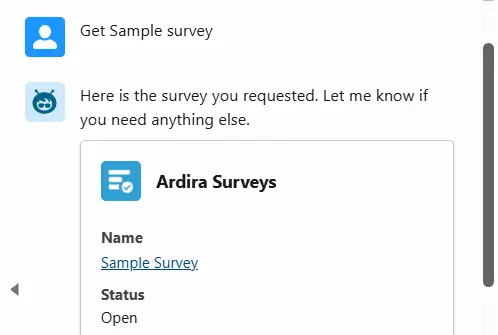
Use case 1 : Search for Survey by name
- Notes:
- This search will retrieve surveys and forms with Draft or Open status.
- It will not fetch a Design Template record.
- Example Utterances for the prompt input box:
- Get {Survey Name} survey.
- Get a survey with the name {Survey Name}.
- Search for {Survey Name} survey.
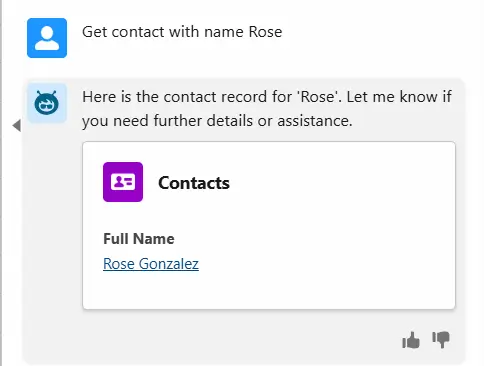
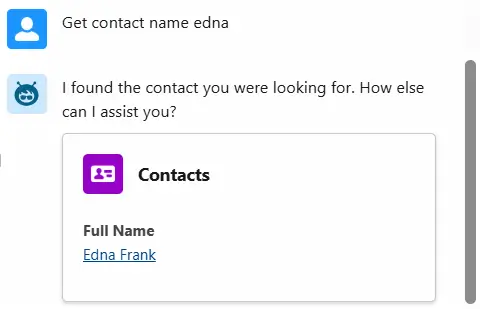
Use case 2 : Search for Target Records
- Notes:
- The Agentforce Agent will retrieve records that the current user has access to.
- This will use Salesforce’s built-in Topic actions.
- Example Utterances for the prompt input box:
- Get contact with name {Contact Name}.
- Get {Contact Name} contact.
- Search for {Contact Name} contact.
- Get {Lead Name} lead.
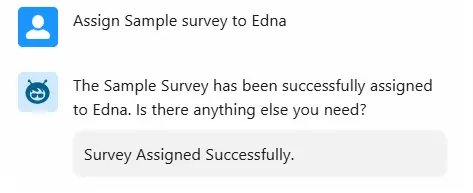
Use case 3 : Assign Surveys
- Notes:
- It is recommended to retrieve survey records first via prompt before assigning surveys.
- If you are assigning surveys to target records, ensure you retrieve target records via prompt before assigning surveys.
- Example Utterances for the prompt input box & order of prompts to assign surveys:
- Get {Survey Name} survey.
- Assign {Survey Name} survey to {email}.
Test an Agent in the Testing Center
- Go to Salesforce Setup.
- Search for “Testing Center” in the Quick Search bar and click on it.

- Click the “New Test” button to create a new test suite for testing agent behavior.
- Fill in the following details:
- Test Name
- Select the agent that was configured previously.
- Add a description for the test.
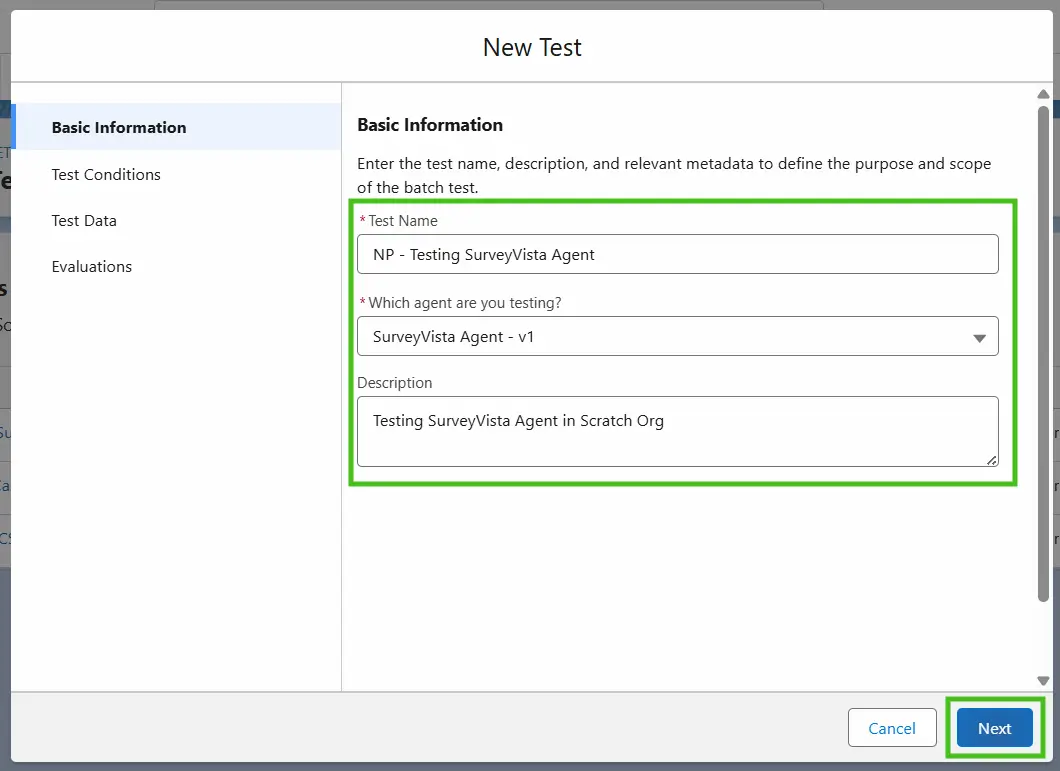
- Click the Next button.
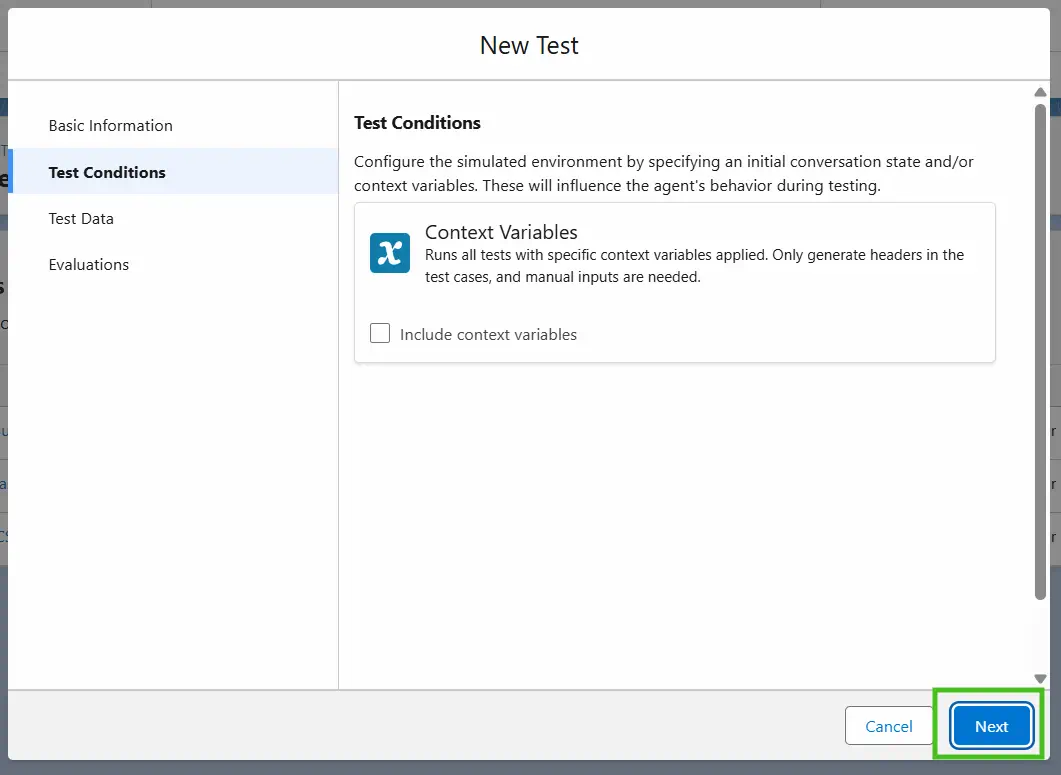
- There is no need to configure anything further, so click the Next button again to proceed.
- Keep “Upload Test Cases (.csv)” selected.
- Download the test file as a CSV file from the provided link.
- Select the downloaded test file for upload.
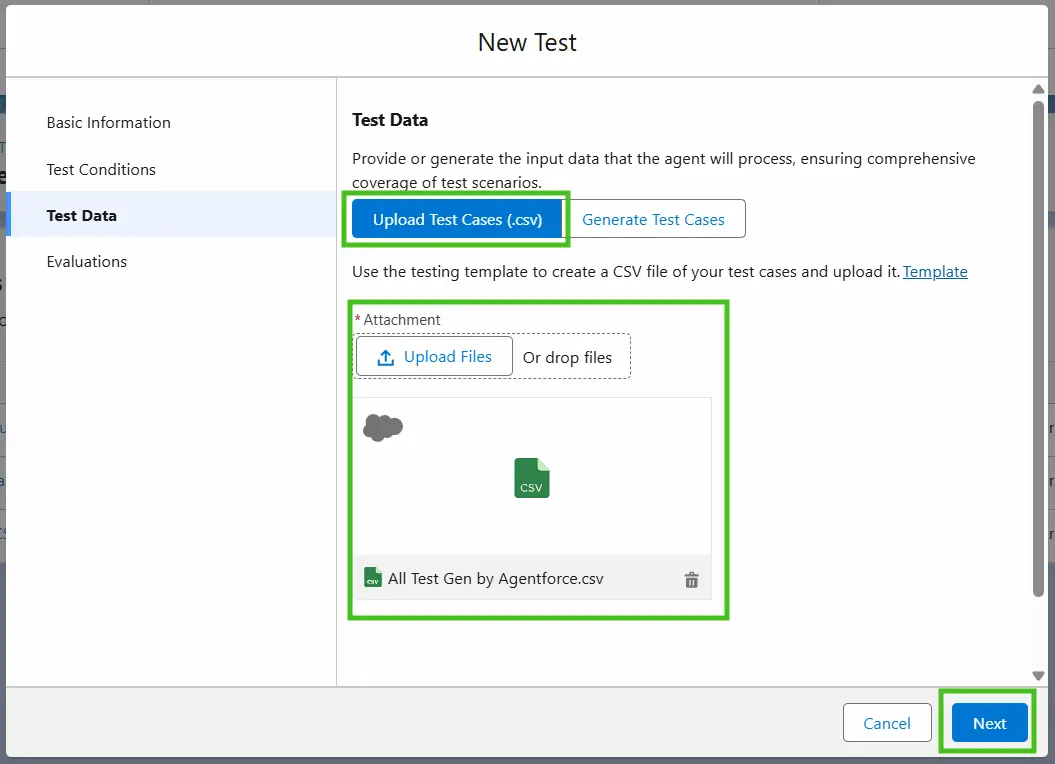
- Click the Next button to proceed.
- In the evaluation settings, select:
- All Default Evaluation options.
- “Conciseness” under Response Quality Evaluations.
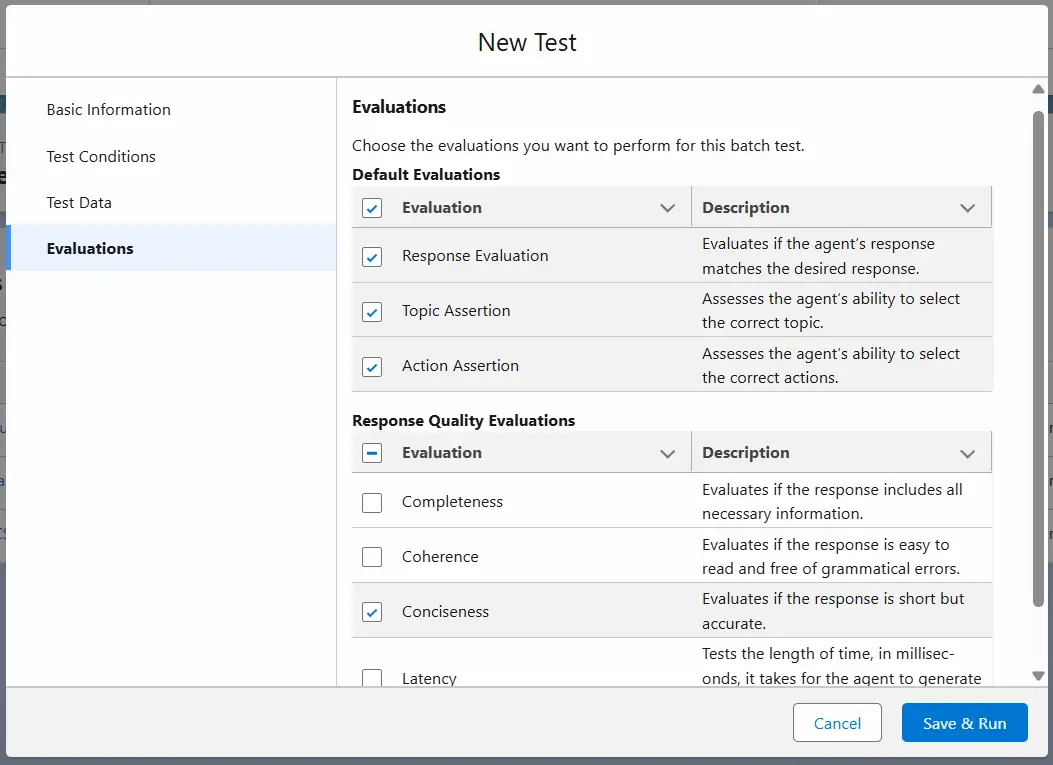
- Click the Save & Run button to start the test.
- Take a coffee break, as running all tests may take some time.
- Once all tests are completed, you will see the results screen.
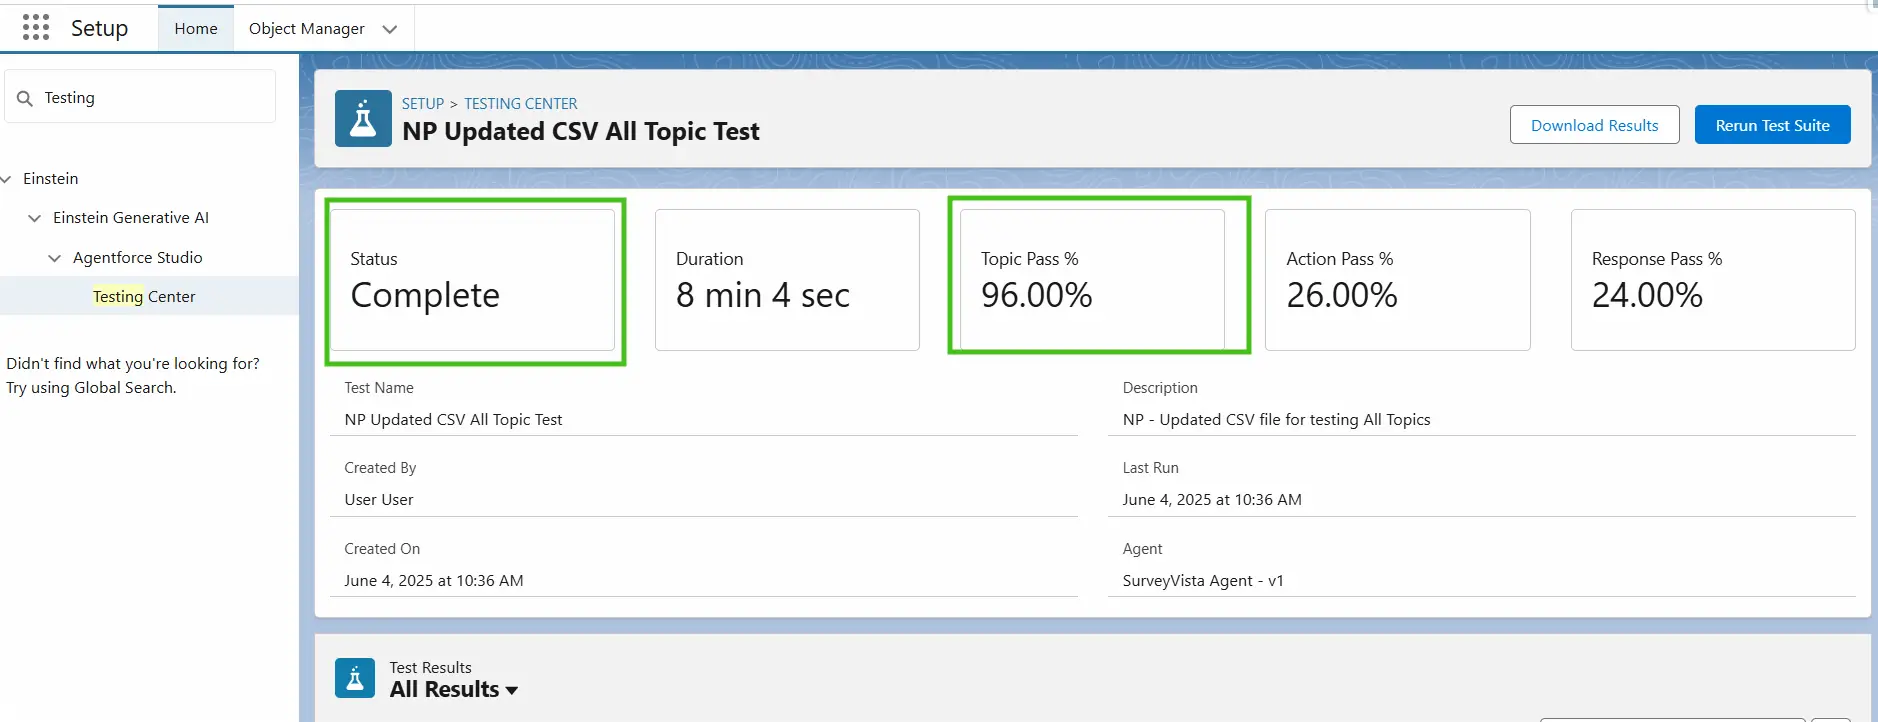
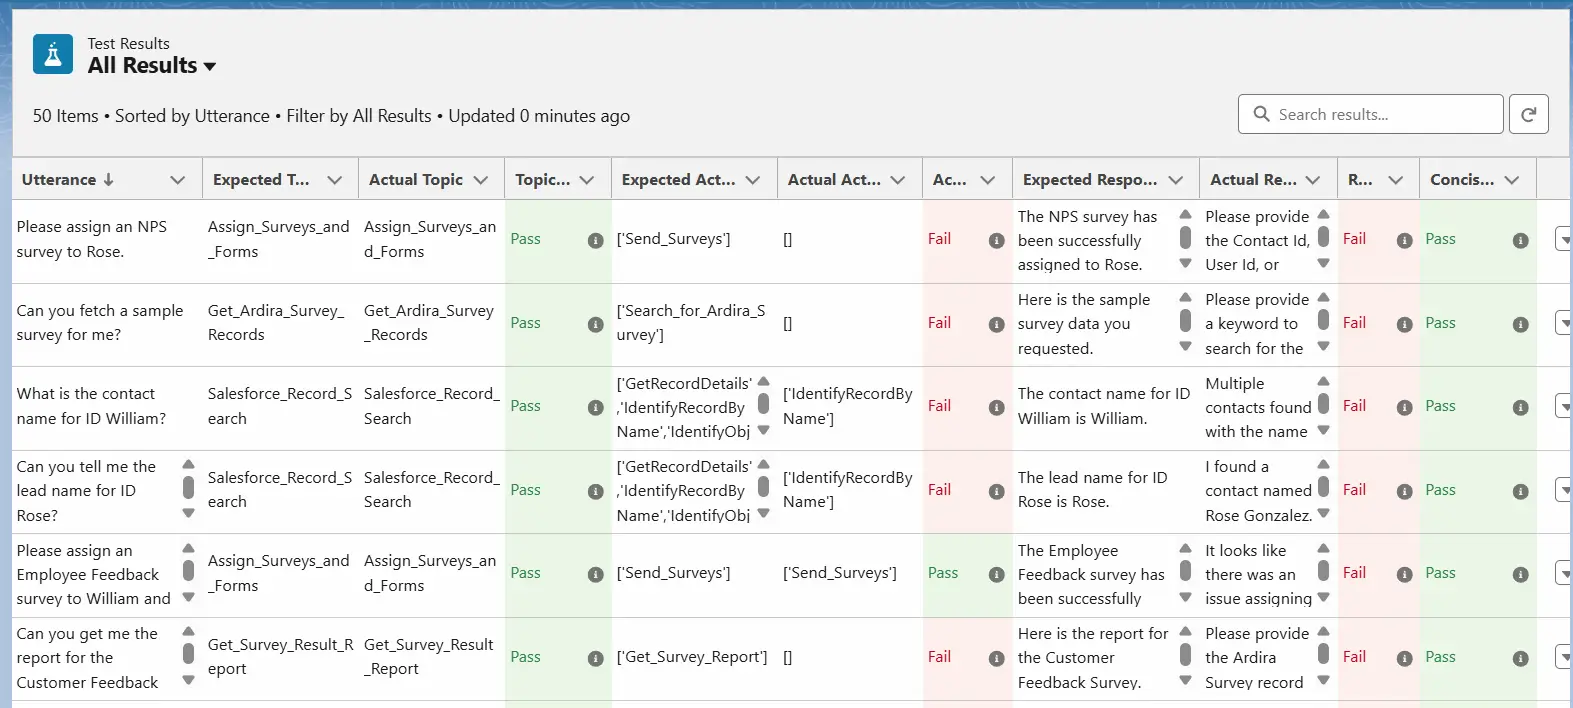
- Scroll down to check the details of the test results.
Have Questions?
For any questions related to AgentVista and SurveyVista : 100% Native Salesforce Surveys, Forms, Quizzes, Assessments, and Checklists, feel free to Contact us at support@surveyvista.com